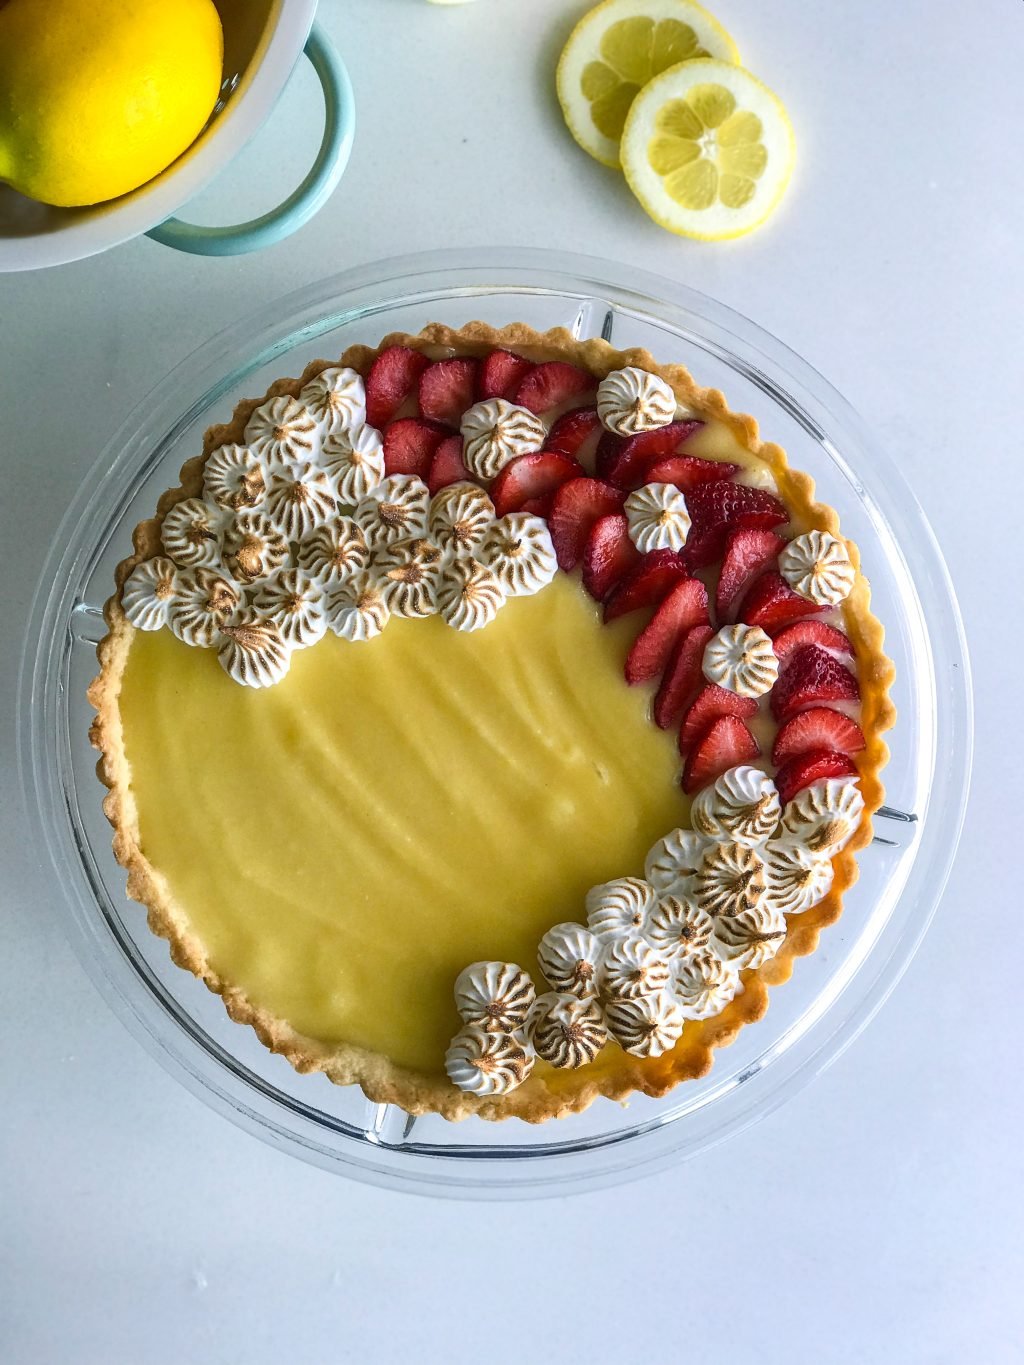
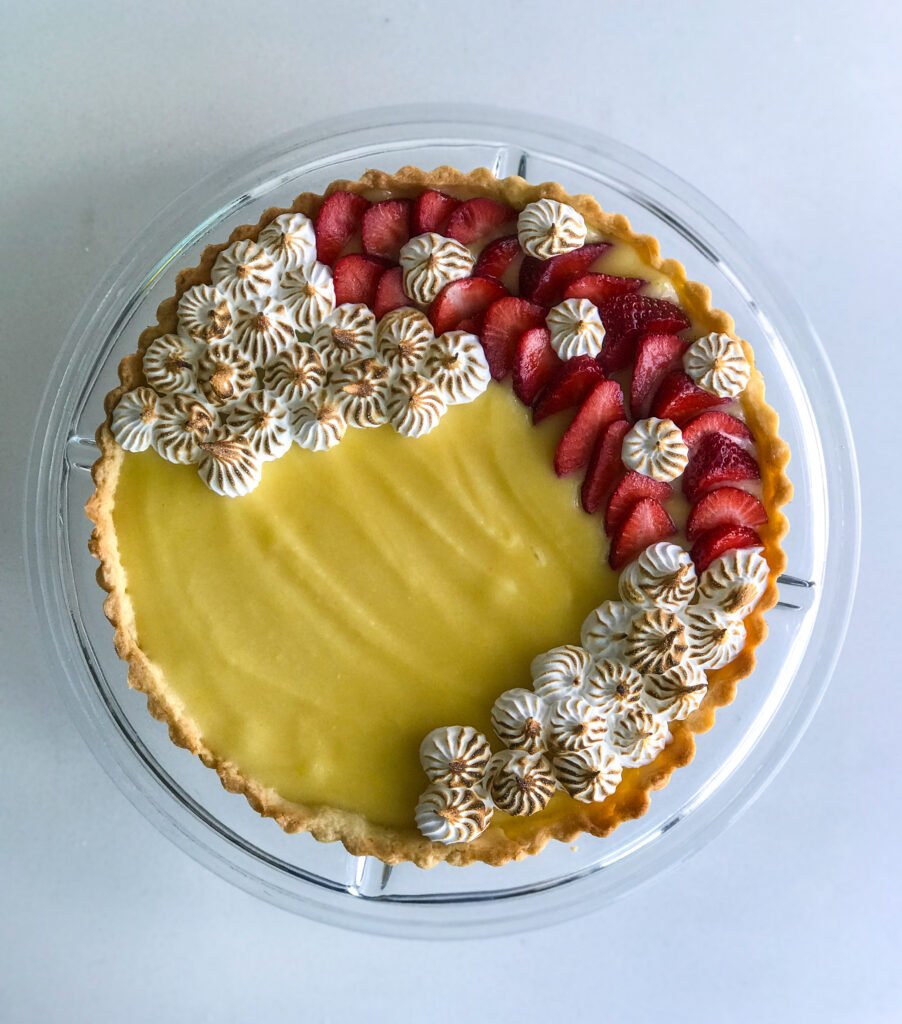
Over the weekend I posted a lemon curd recipe. That was my lead up to this tart, because you will need that to make this. This tart is always an instant hit with company at my house. It’s usually an unexpected dessert that easily dresses up any table. The perfect sweetness of lemon, fresh fruit and burnt meringue. I always say, lemon adds a little cheer to anyone’s day.
This is a longer post than I usually write because this tart comes with three different recipes. You’re probably saying “oh Nicole! I don’t know if I have time for this…” I know it sounds overwhelming right now but I’ll break it down into simple steps to help you achieve this Lemon Curd Tart, just stick with me. The best news is that you can make the crust and the curd days in advance making it easier to accomplish, see notes below for all the tips and tricks.
The tart shell (Pâte Sucrée). Pâte Sucrée is a sweet French tart shell. Unlike pie crust, which usually does not have sugar added, this one does. This recipe comes together quickly and is also a little less finicky than most doughs. It makes two at a time, so you can freeze one for later, it defrosts easily and tastes fresh. You can make the dough a couple days ahead of time and keep it in the refrigerator until you’re ready to make the tart.
The curd. I filled this tart with my lemon curd recipe. You can also substitute the lemon with any other citrus, orange or lime would still give you a bright fresh flavor for any springtime or summer occasion. This will stay good up in the refrigerator so it’s perfect to make a few days in advance if you want to break up the tasks.
The meringue. There are three types of meringue in the culinary field. French, Swiss and Italian. Using my culinary school notes, I’ll give you a quick overview of each.
French: this is the most basic, made by whipping egg whites and sugar together, see recipe below, best for simple cakes & mousses.
Swiss: made by heating the egg whites and sugar over a bain marie before whipping into a peak, best for pie & baked Alaska
Italian: this is the least basic, made by heating the sugar to a soft boil and then whipping in the egg whites, best for buttercream
Pâte Sucrée (French Sweet Dough)
Ingredients
- 12 oz All Purpose Flour (approx. 2 3/4 cups & 2 TBSP)
- 4 oz Sugar (approx. 1/2 cup & 1 TBSP)
- 8 oz Butter – cubed at room temperature
- 1 Egg
- Zest of one Lemon
Special Tools
- Baking beans/weights
- Parchment paper
Instructions
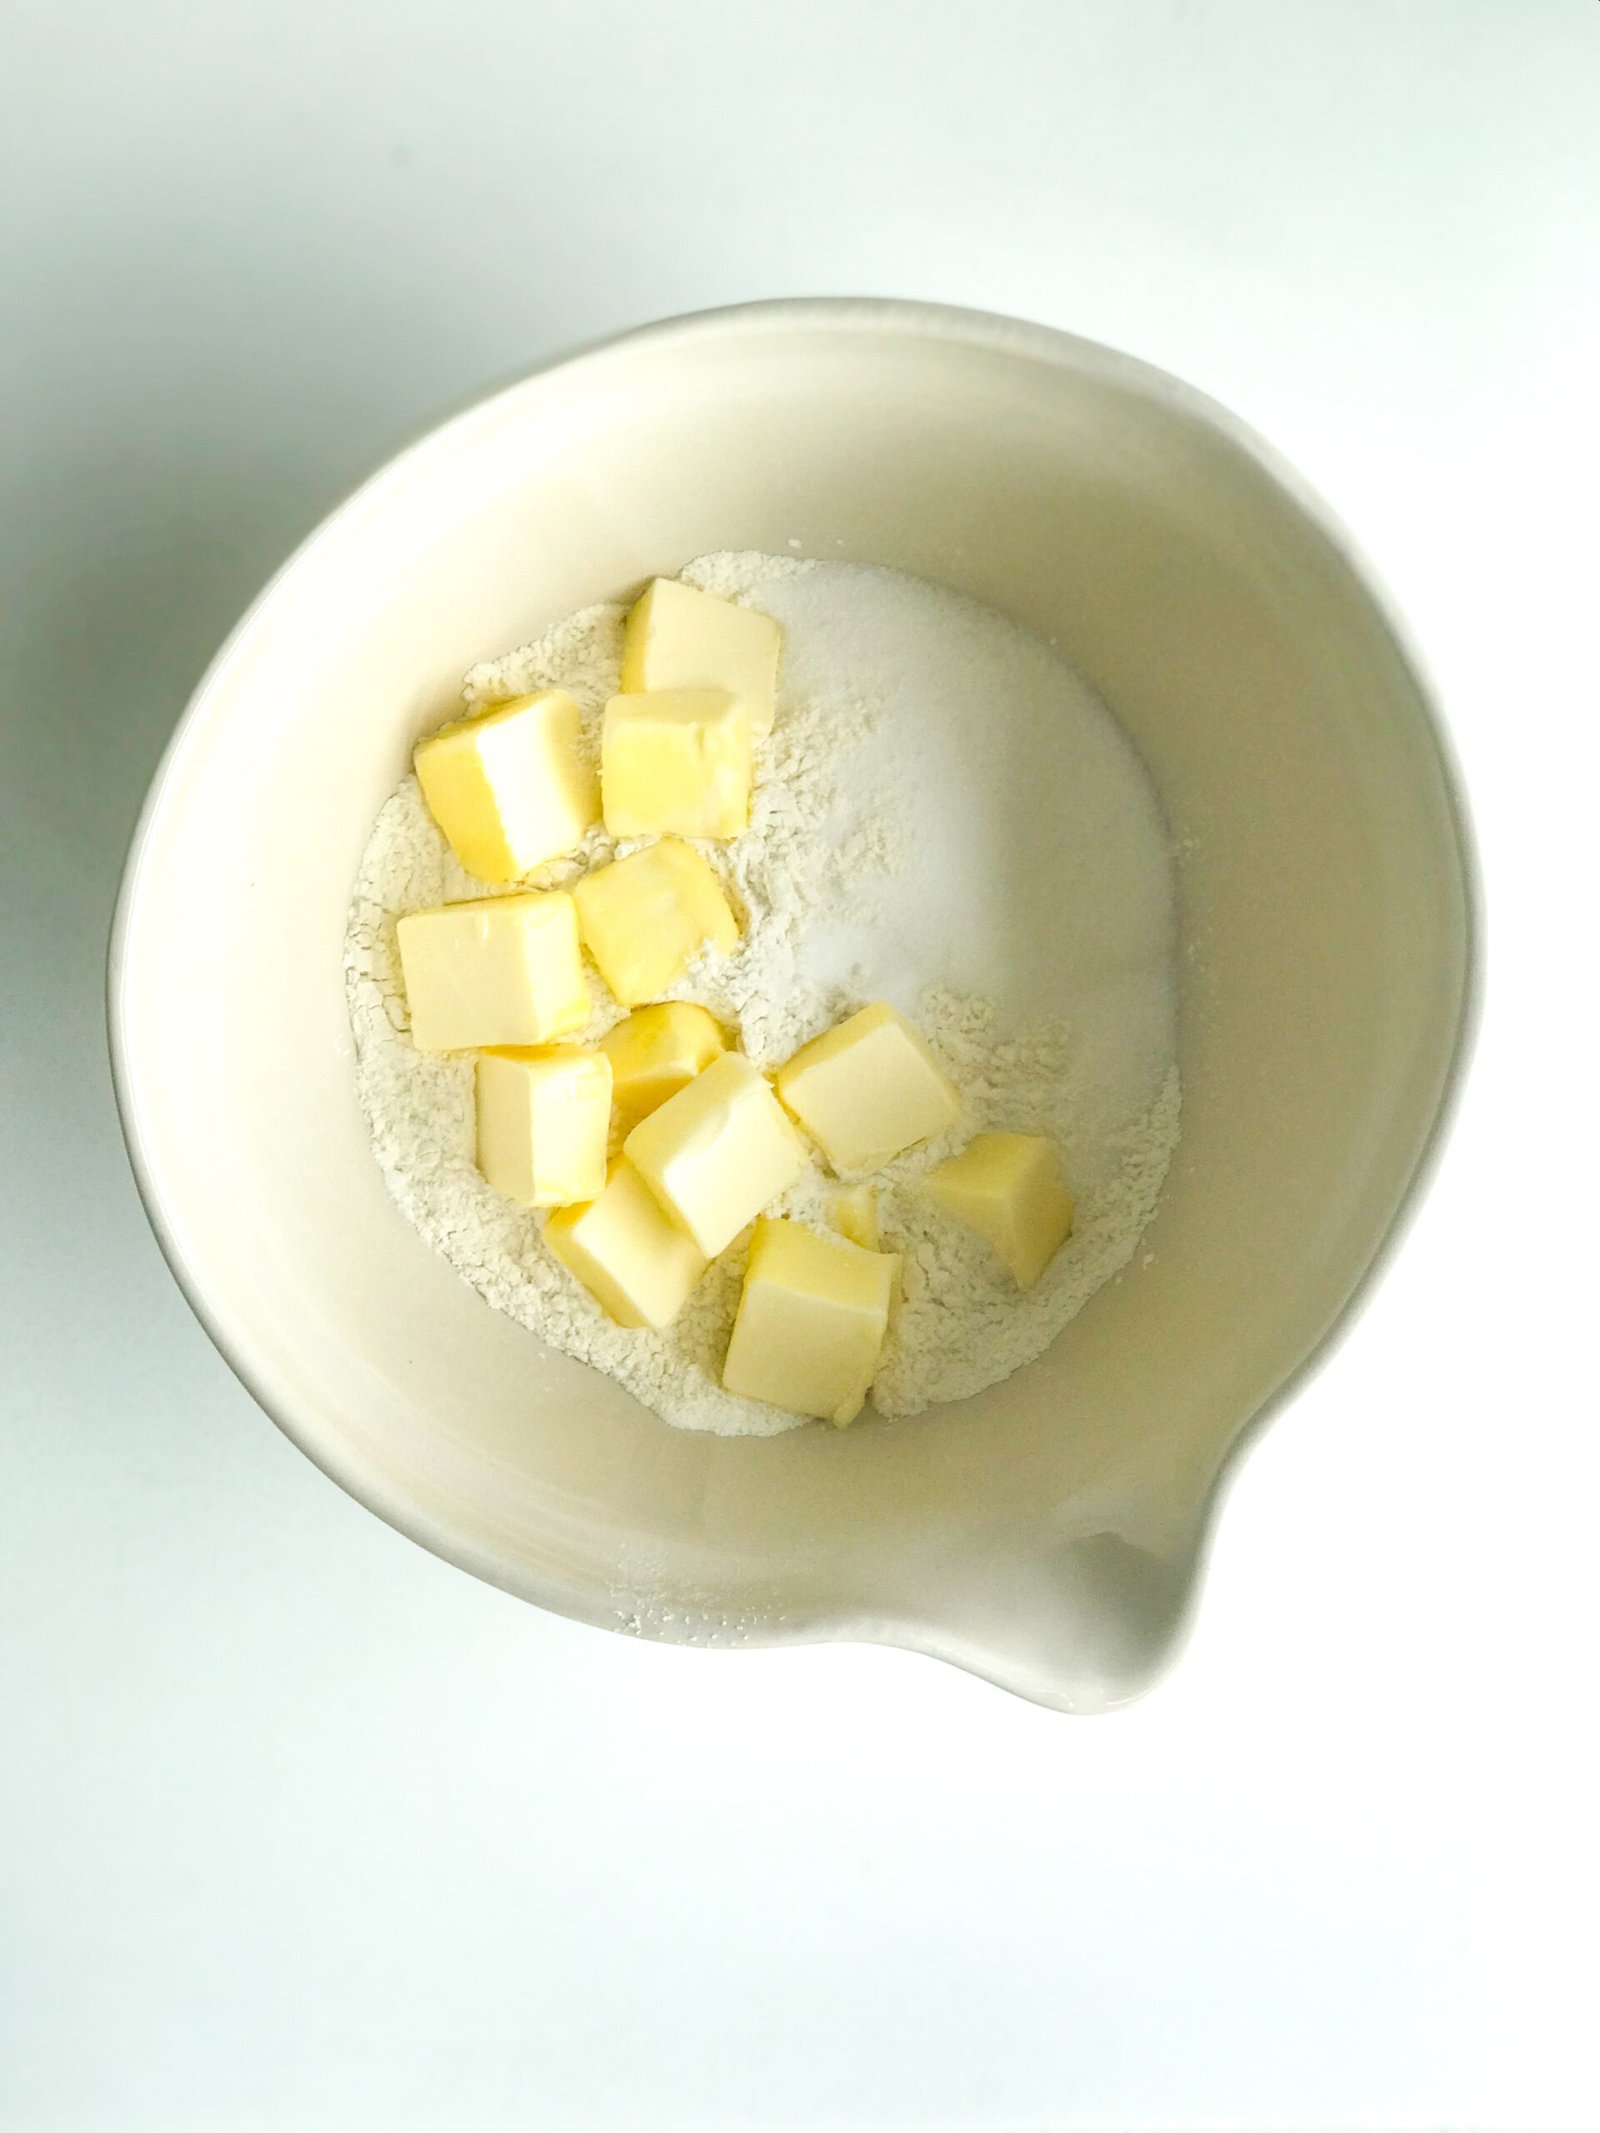
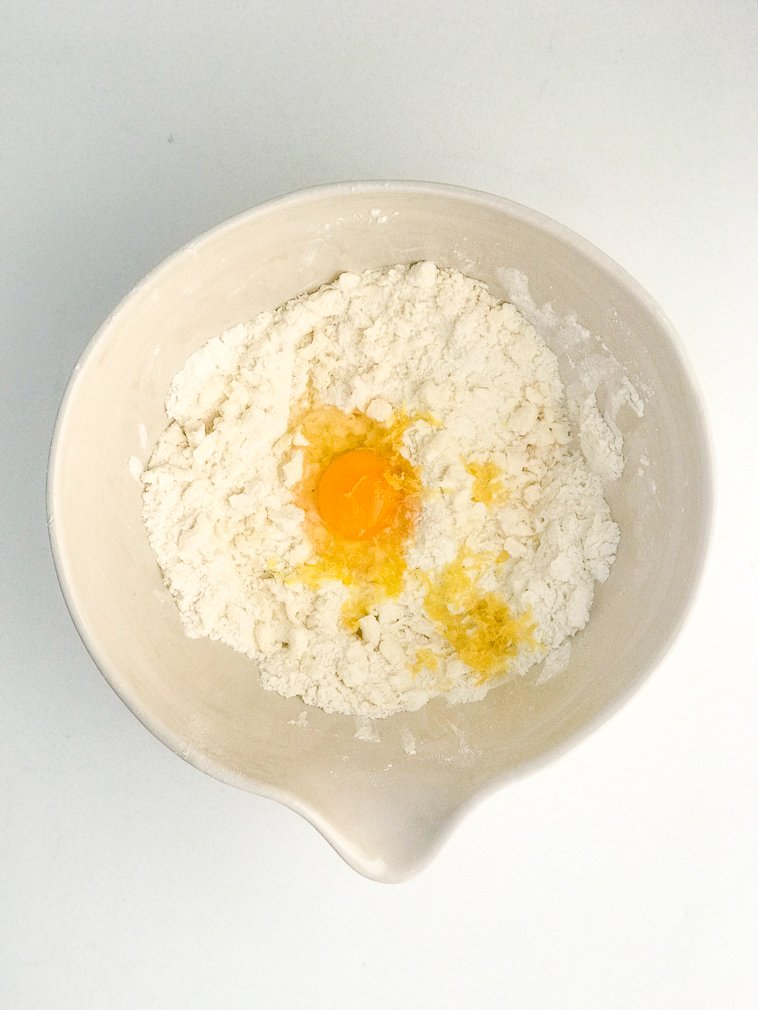
- In a bowl, mix together your dry ingredients.
- Add in your cubed butter.
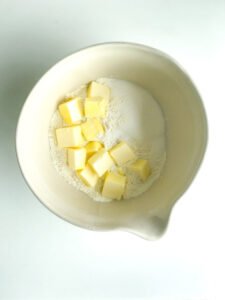
- Using a pastry cutter, fork or your fingers, cut the the butter into the dry ingredients, until it’s evenly distributed throughout.
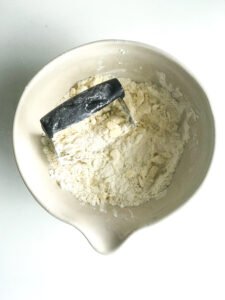
- Add in your egg and lemon zest.
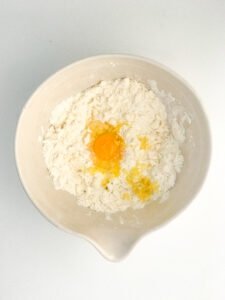
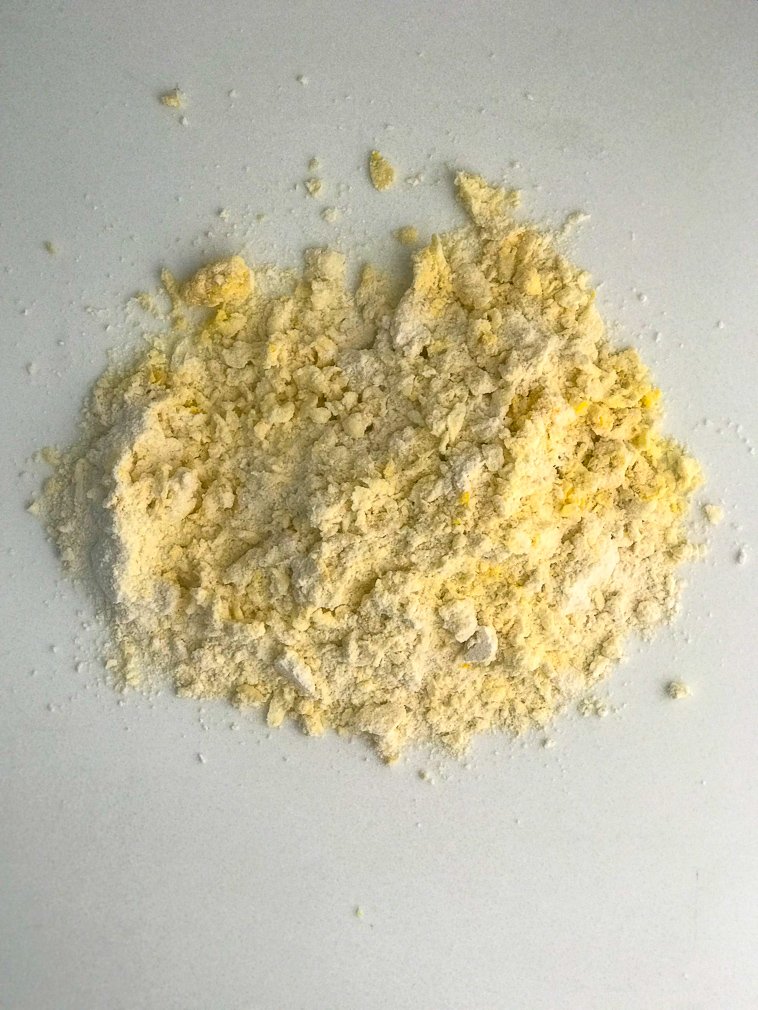
- Using a pastry cutter, fork or your fingers, break up the egg and mix into the dough. Once the egg is incorporated, dump the dough out on the counter. It maybe a little crumbly still.
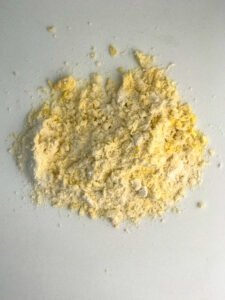
- Using your hands start working the dough so that the ingredients become homogeneous. Unlike cold butter for pie dough, this butter should be completely incorporated into the dough. It will kind of resemble cookie dough.
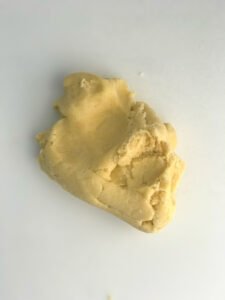
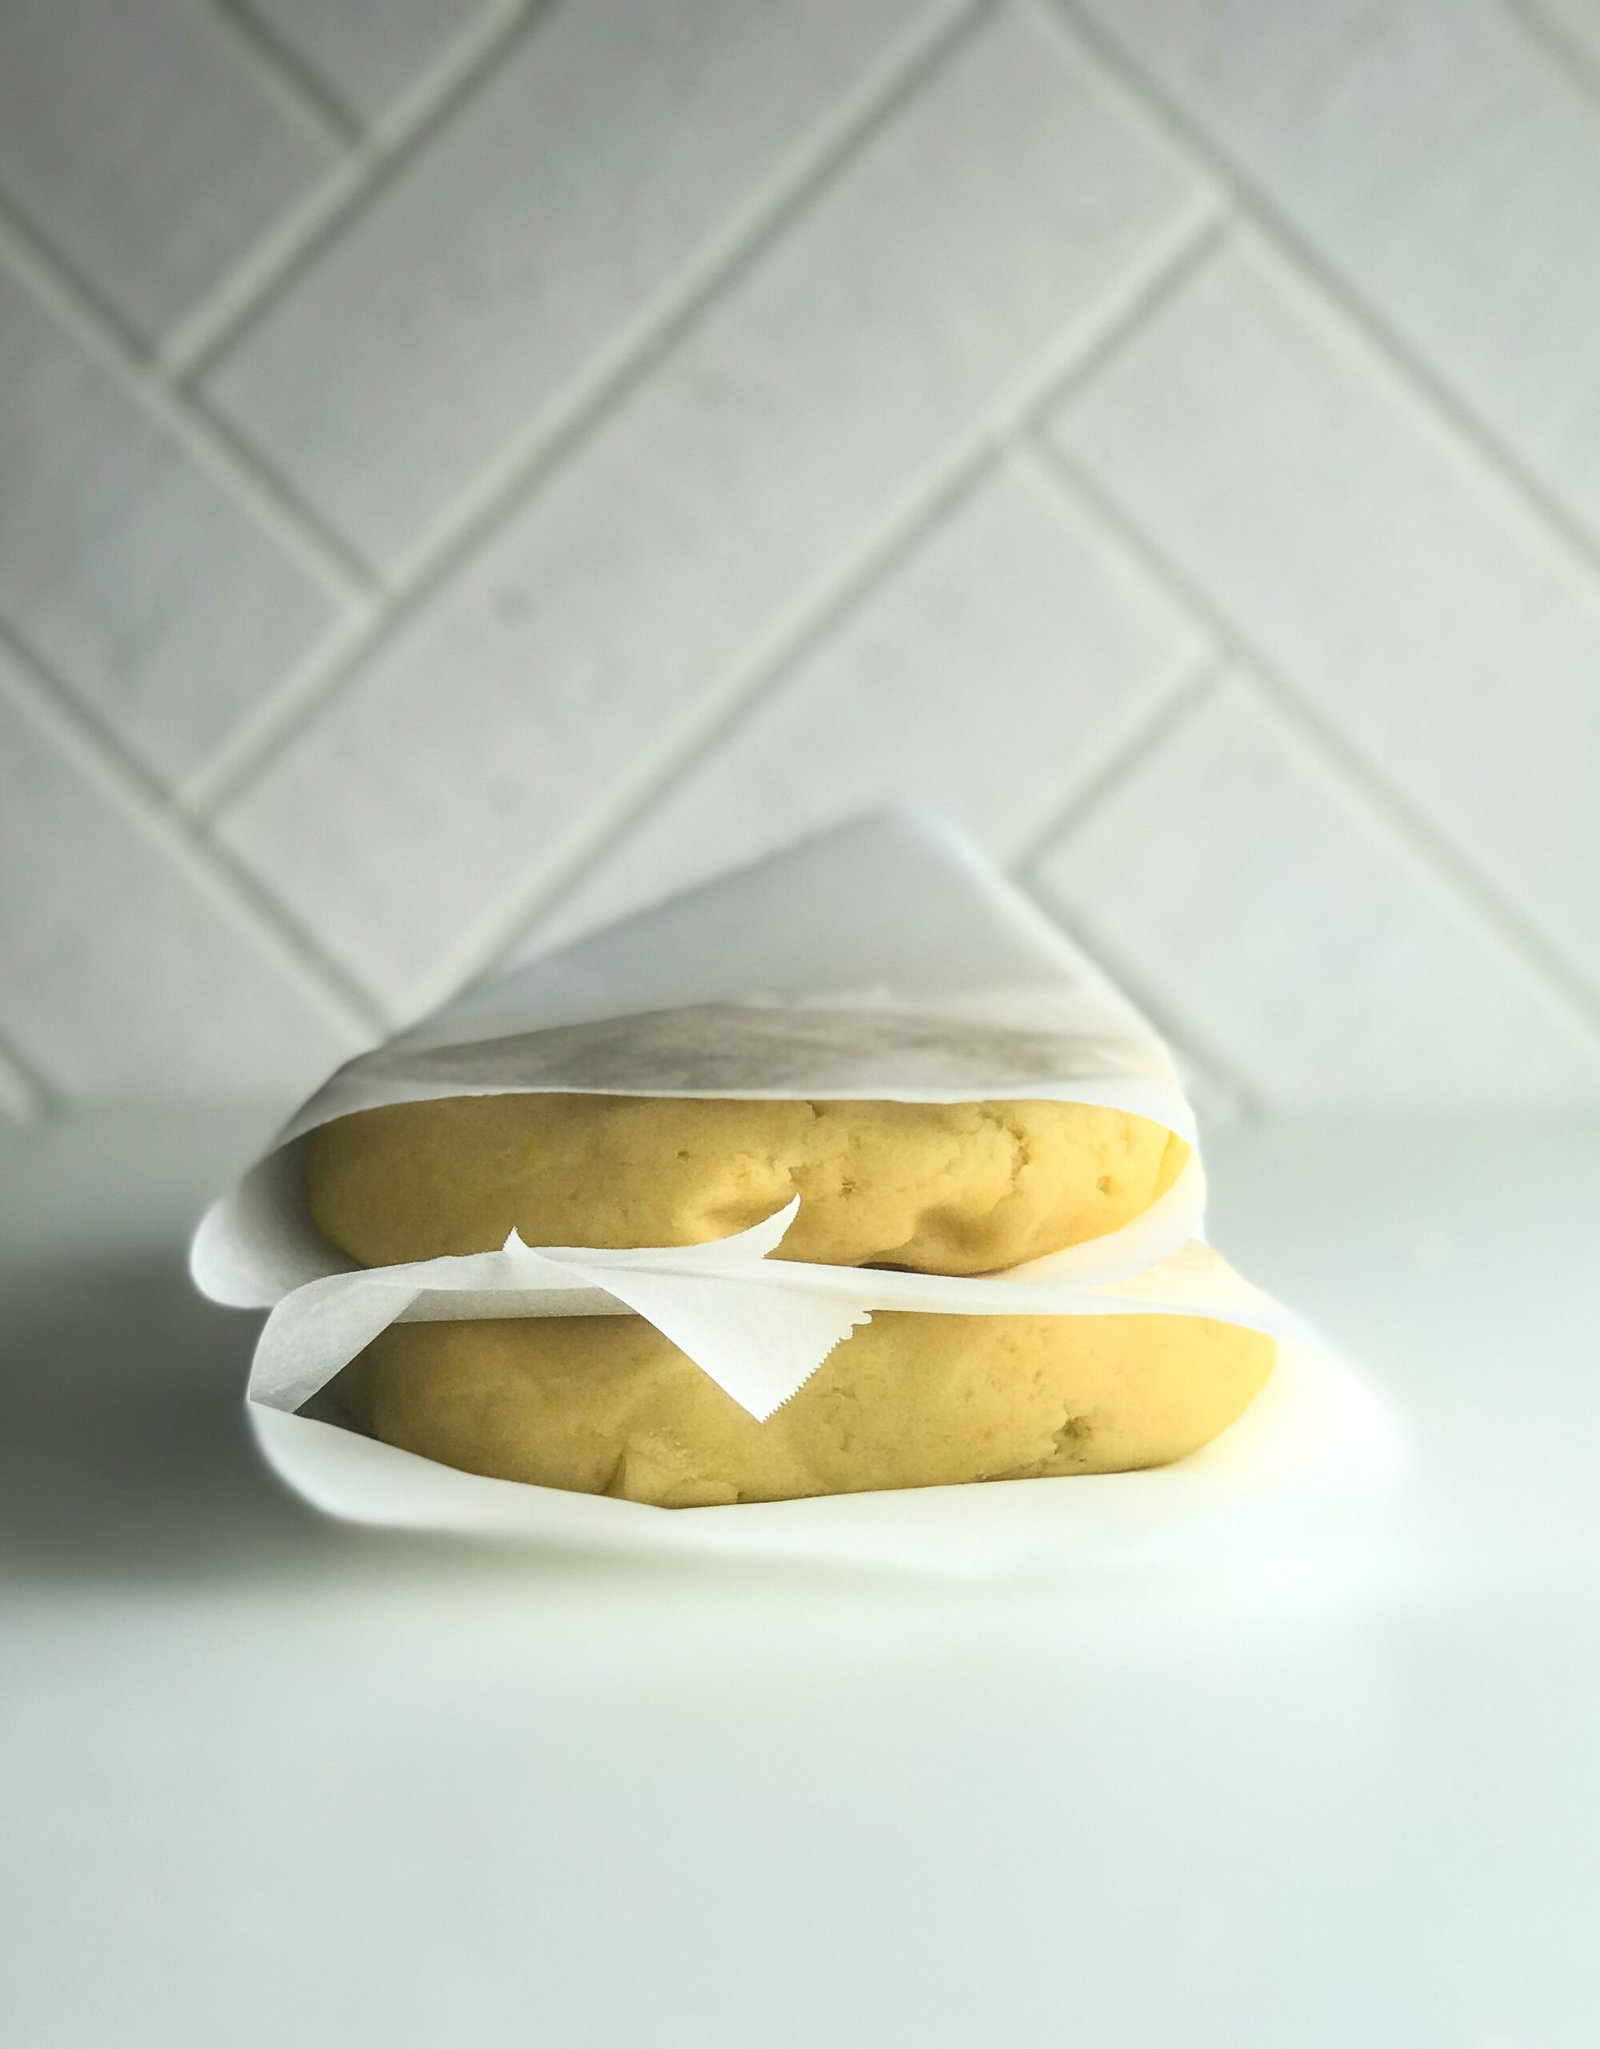
- Cut the dough into two evenly sized disks. Wrap in parchment paper and refrigerate for at least 30 minutes or up to 2 days. *you can freeze your second dough at this point for future use. Place in a freezer-safe bag, label it and freeze. See notes below for defrosting instructions.

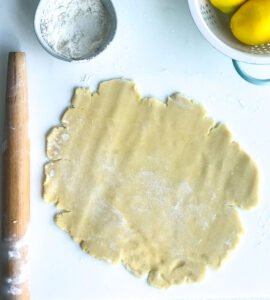
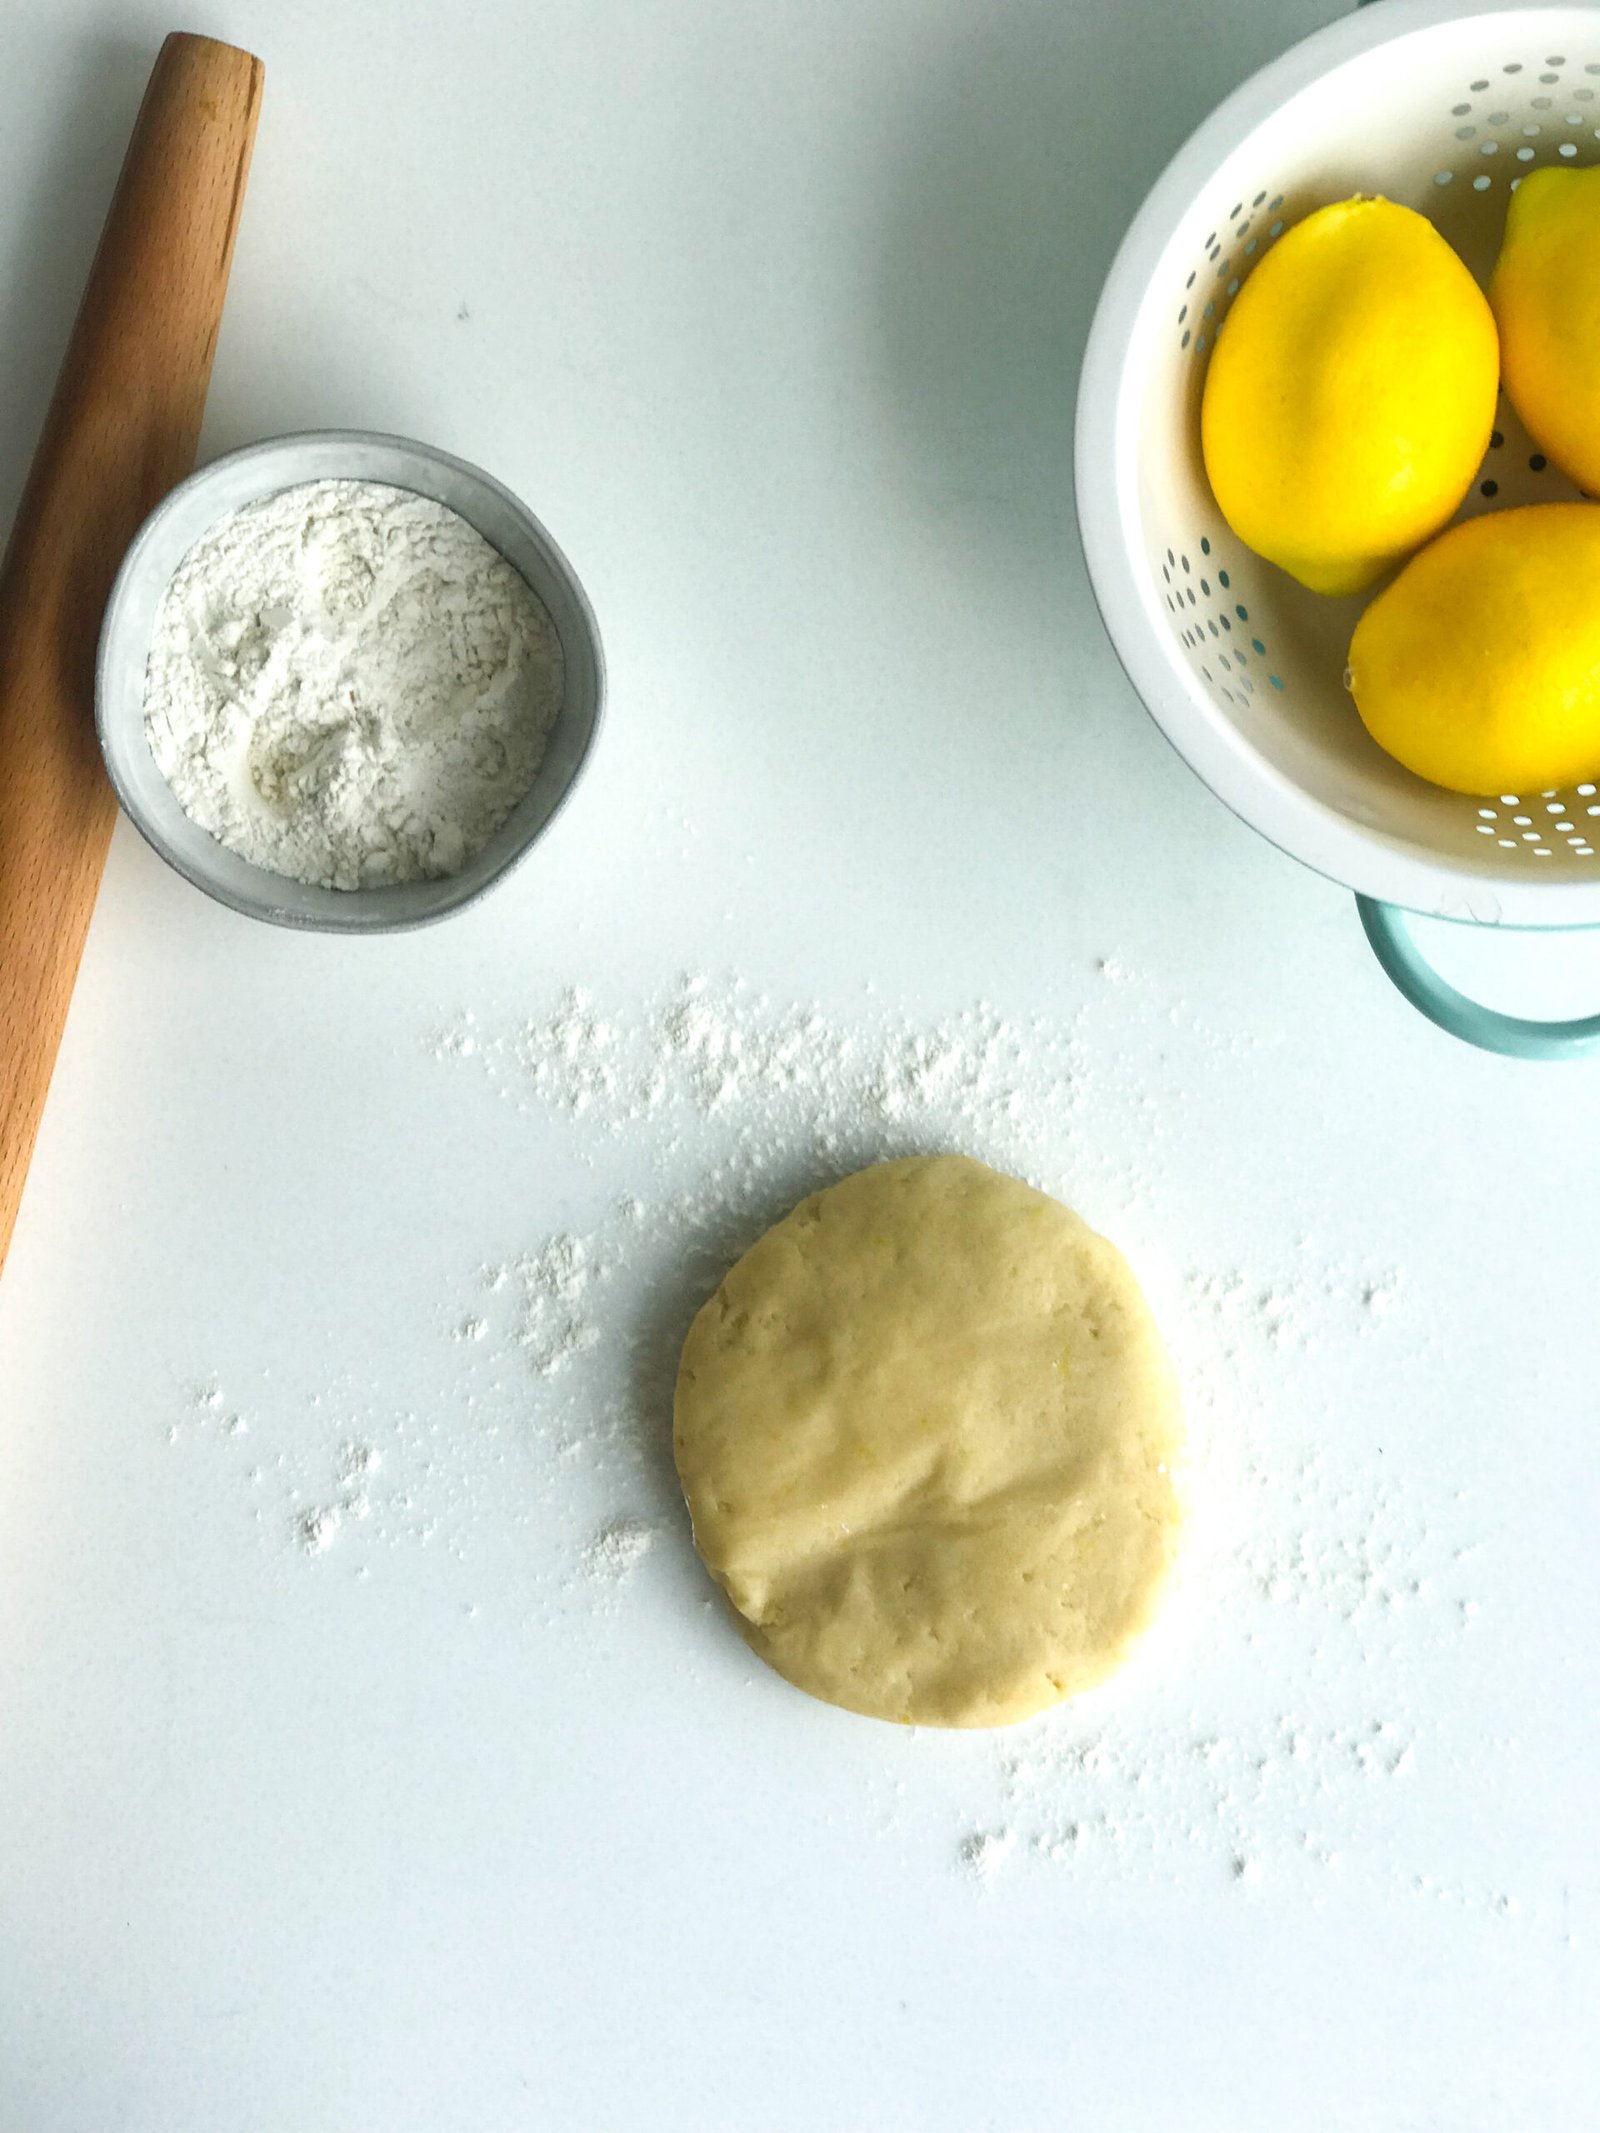
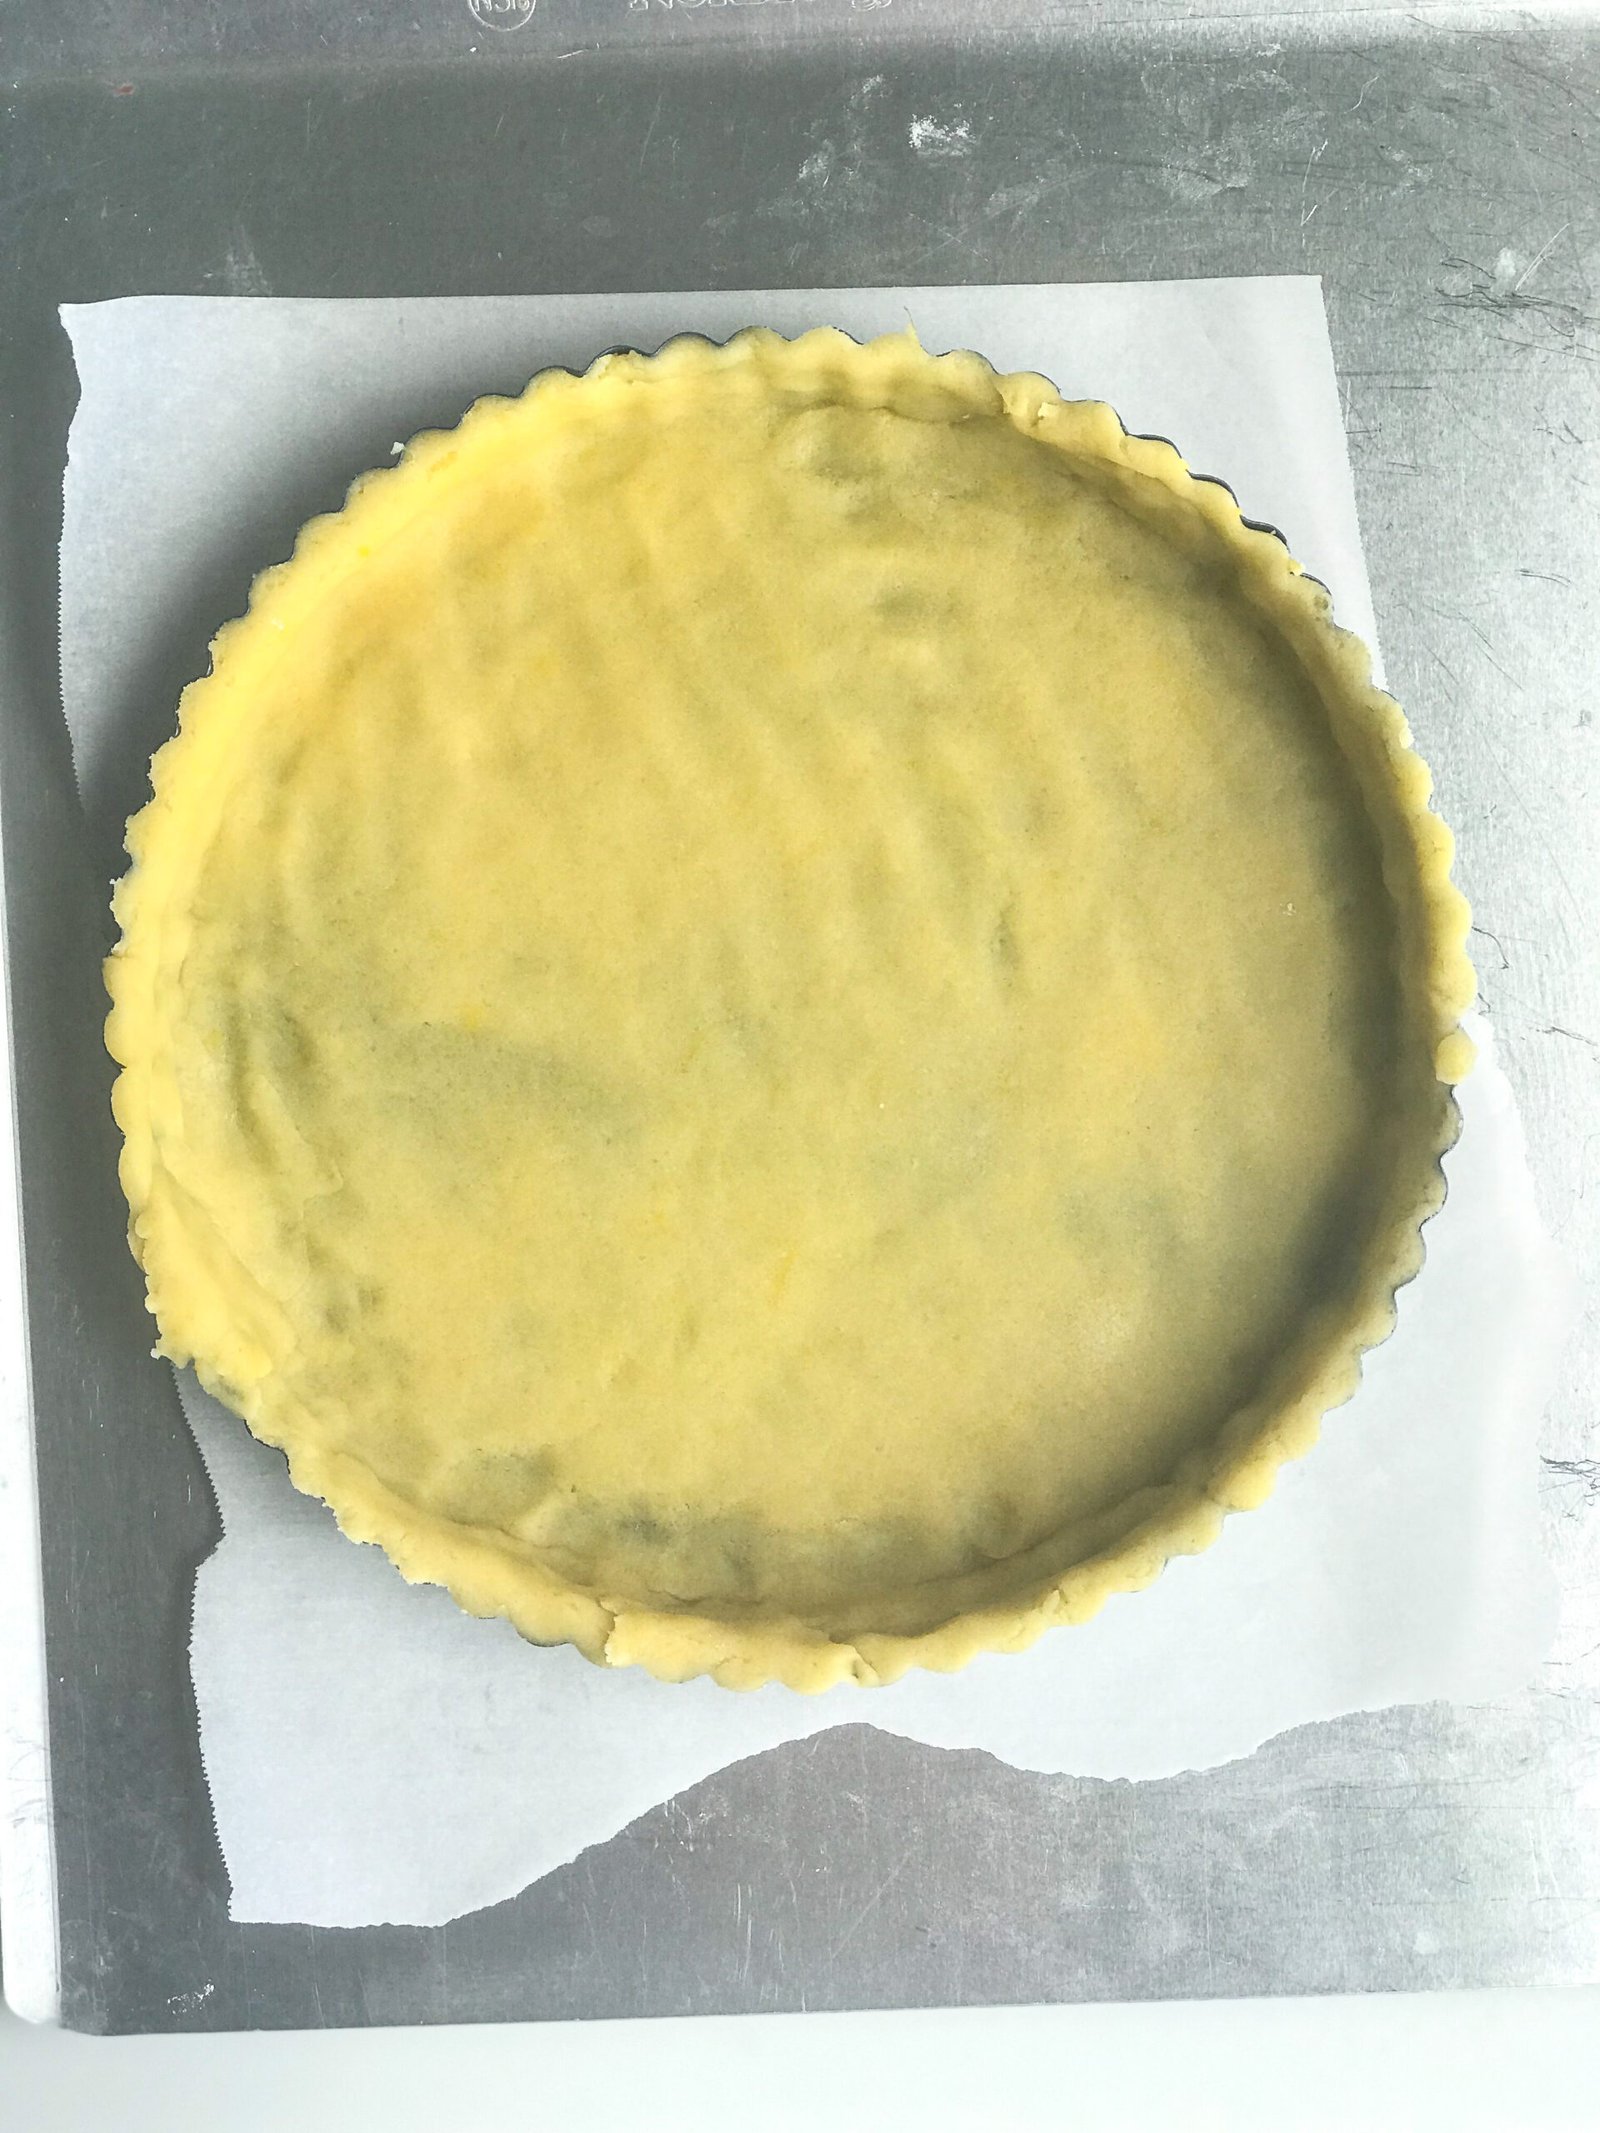
- After the dough has had time to chill, take it out of the refrigerator and let it rest for 2-3 minutes, this will make it easier to start the rolling process.Warning: make sure your dough chills for at least 30 minutes, as the dough starts to warm up it will become increasingly harder to manage because the butter will become too soft. So you will need to work uninterrupted until the dough is in the tart pan.

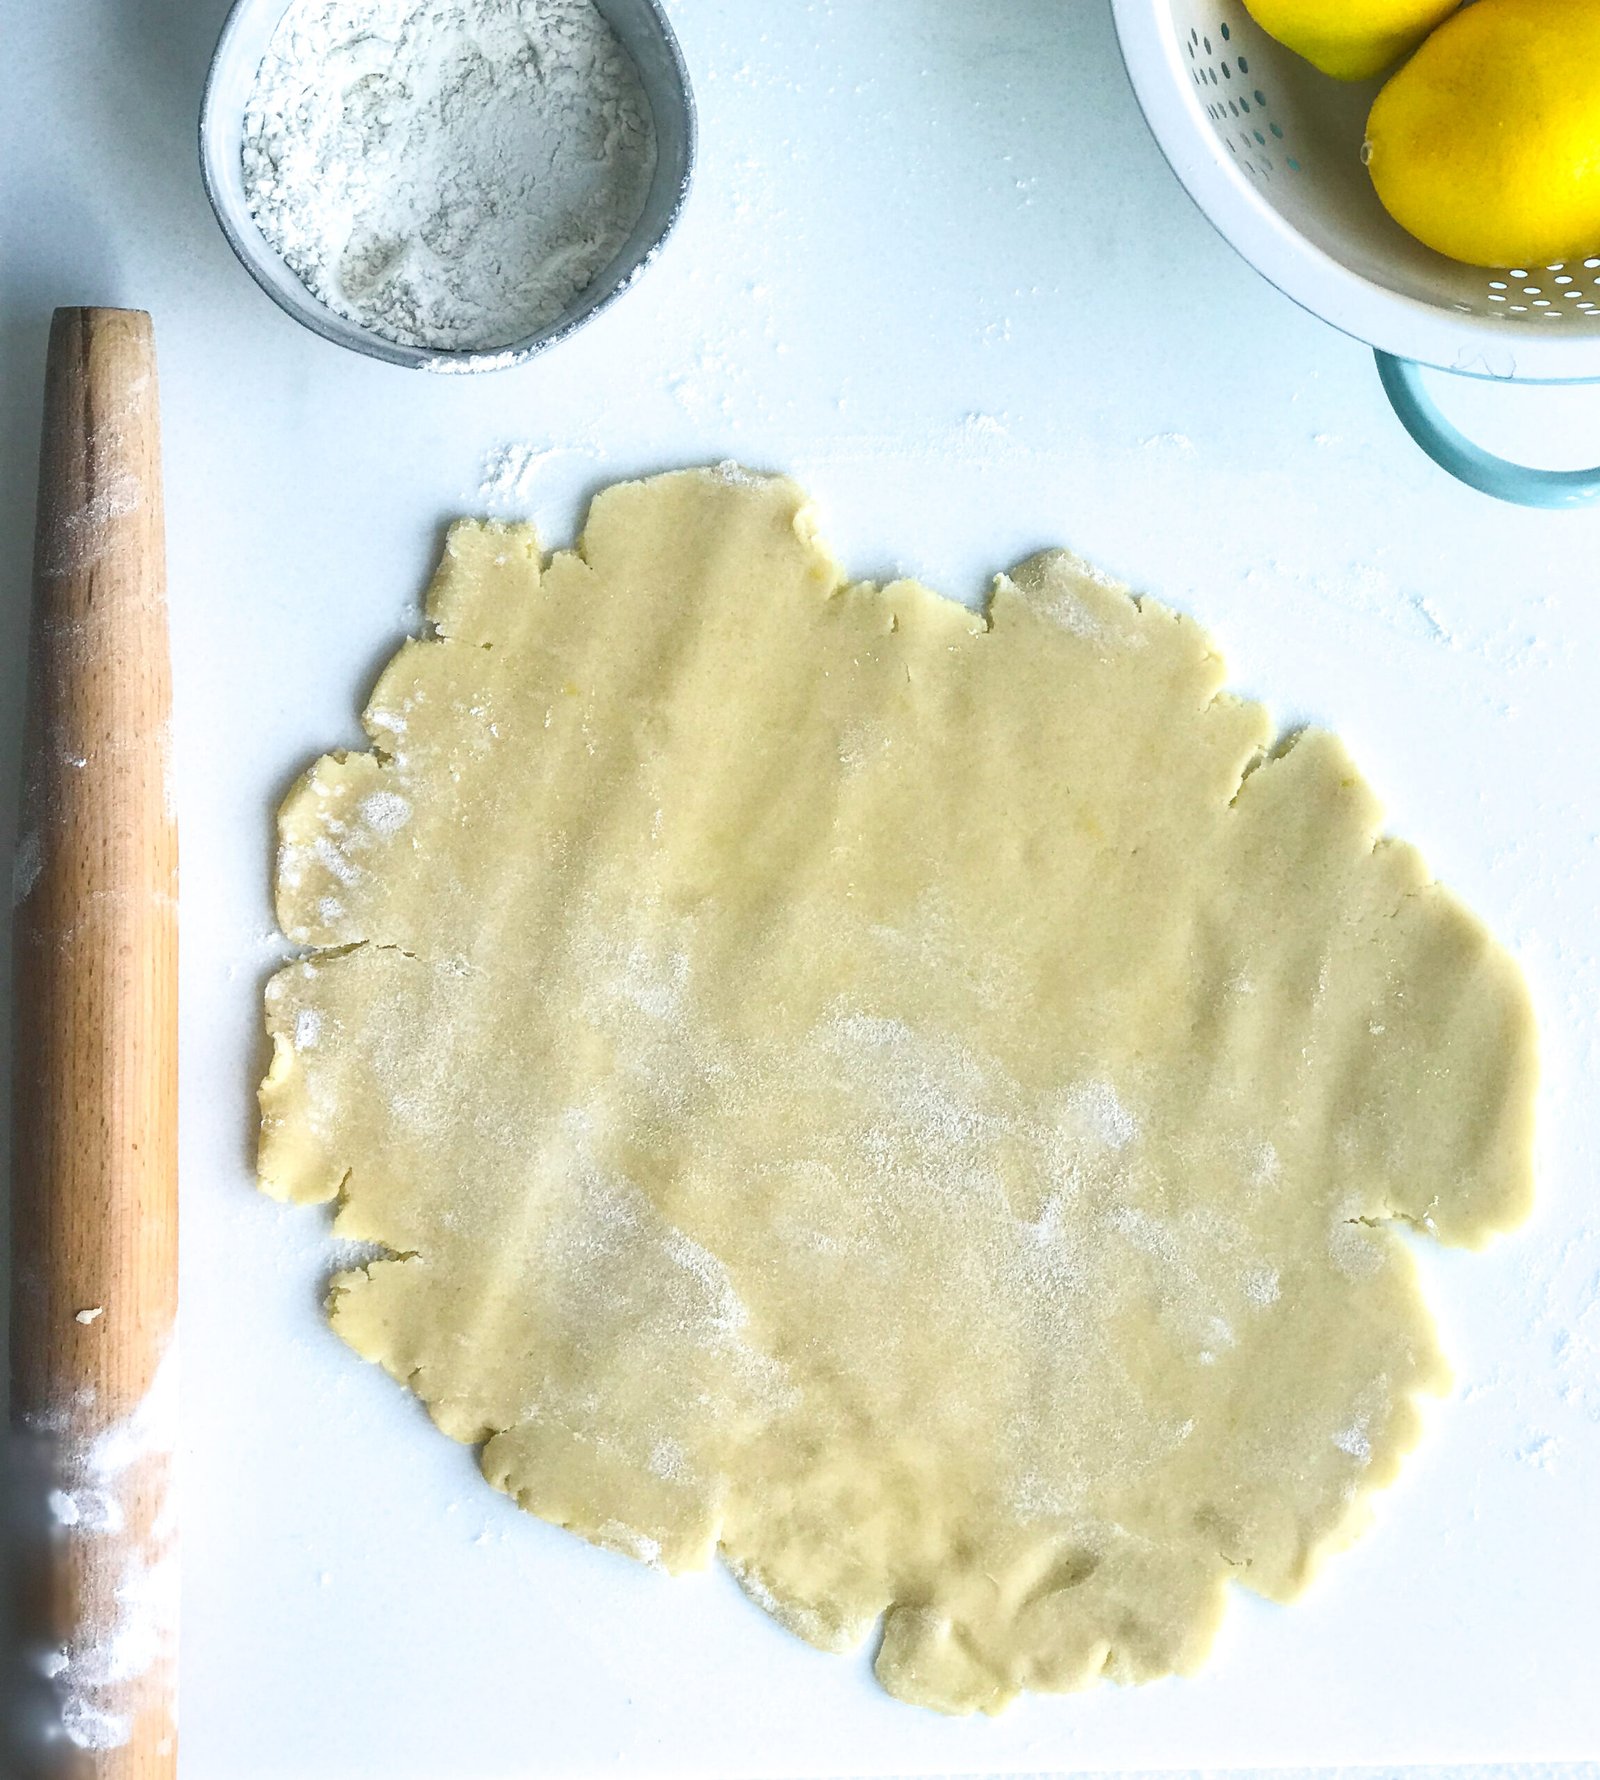
- Sprinkle a little of all purpose flour on your counter and carefully roll the dough out, pressing evenly with your rolling pin. You can sprinkle flour on the dough as needed to help prevent the rolling pin from sticking. To keep a circular shape as your roll turn your dough a little after a couple of rolls.
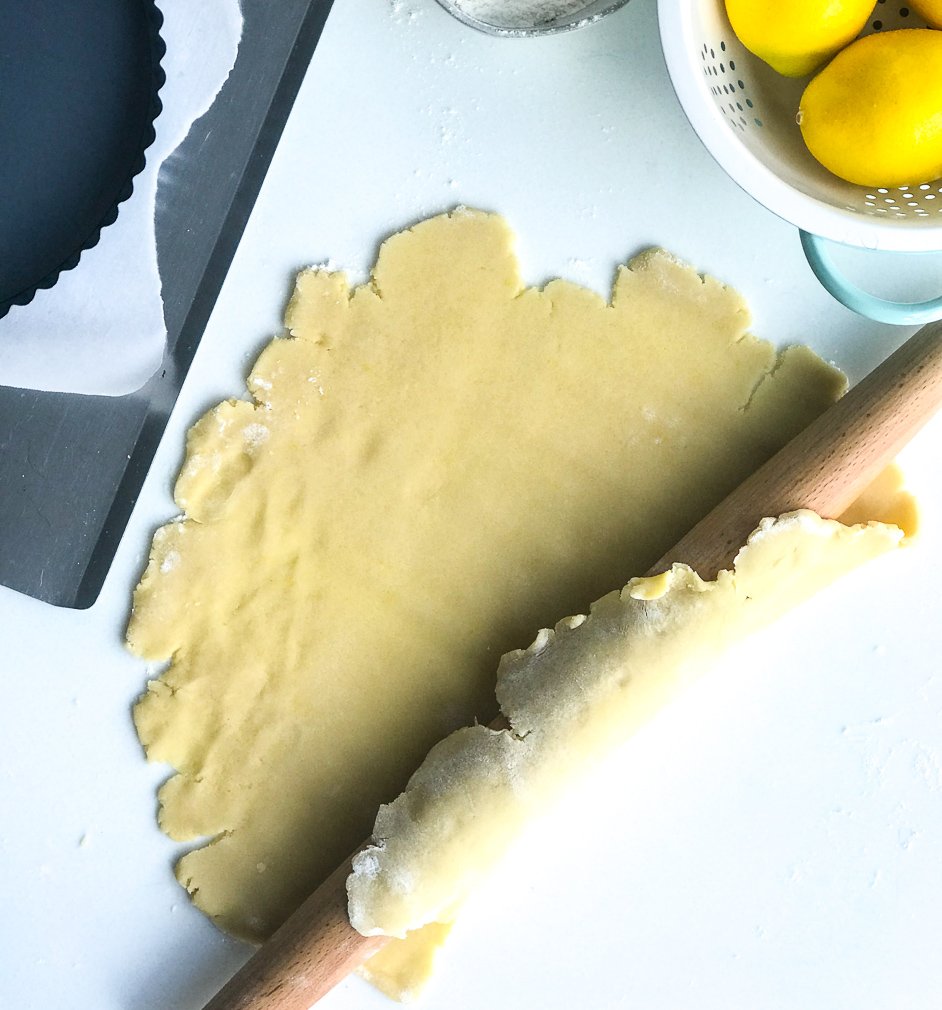
- Carefully lift the dough up using your rolling pin.
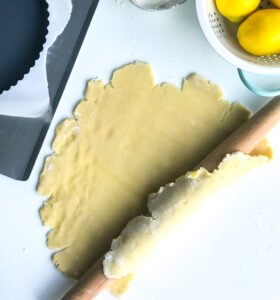
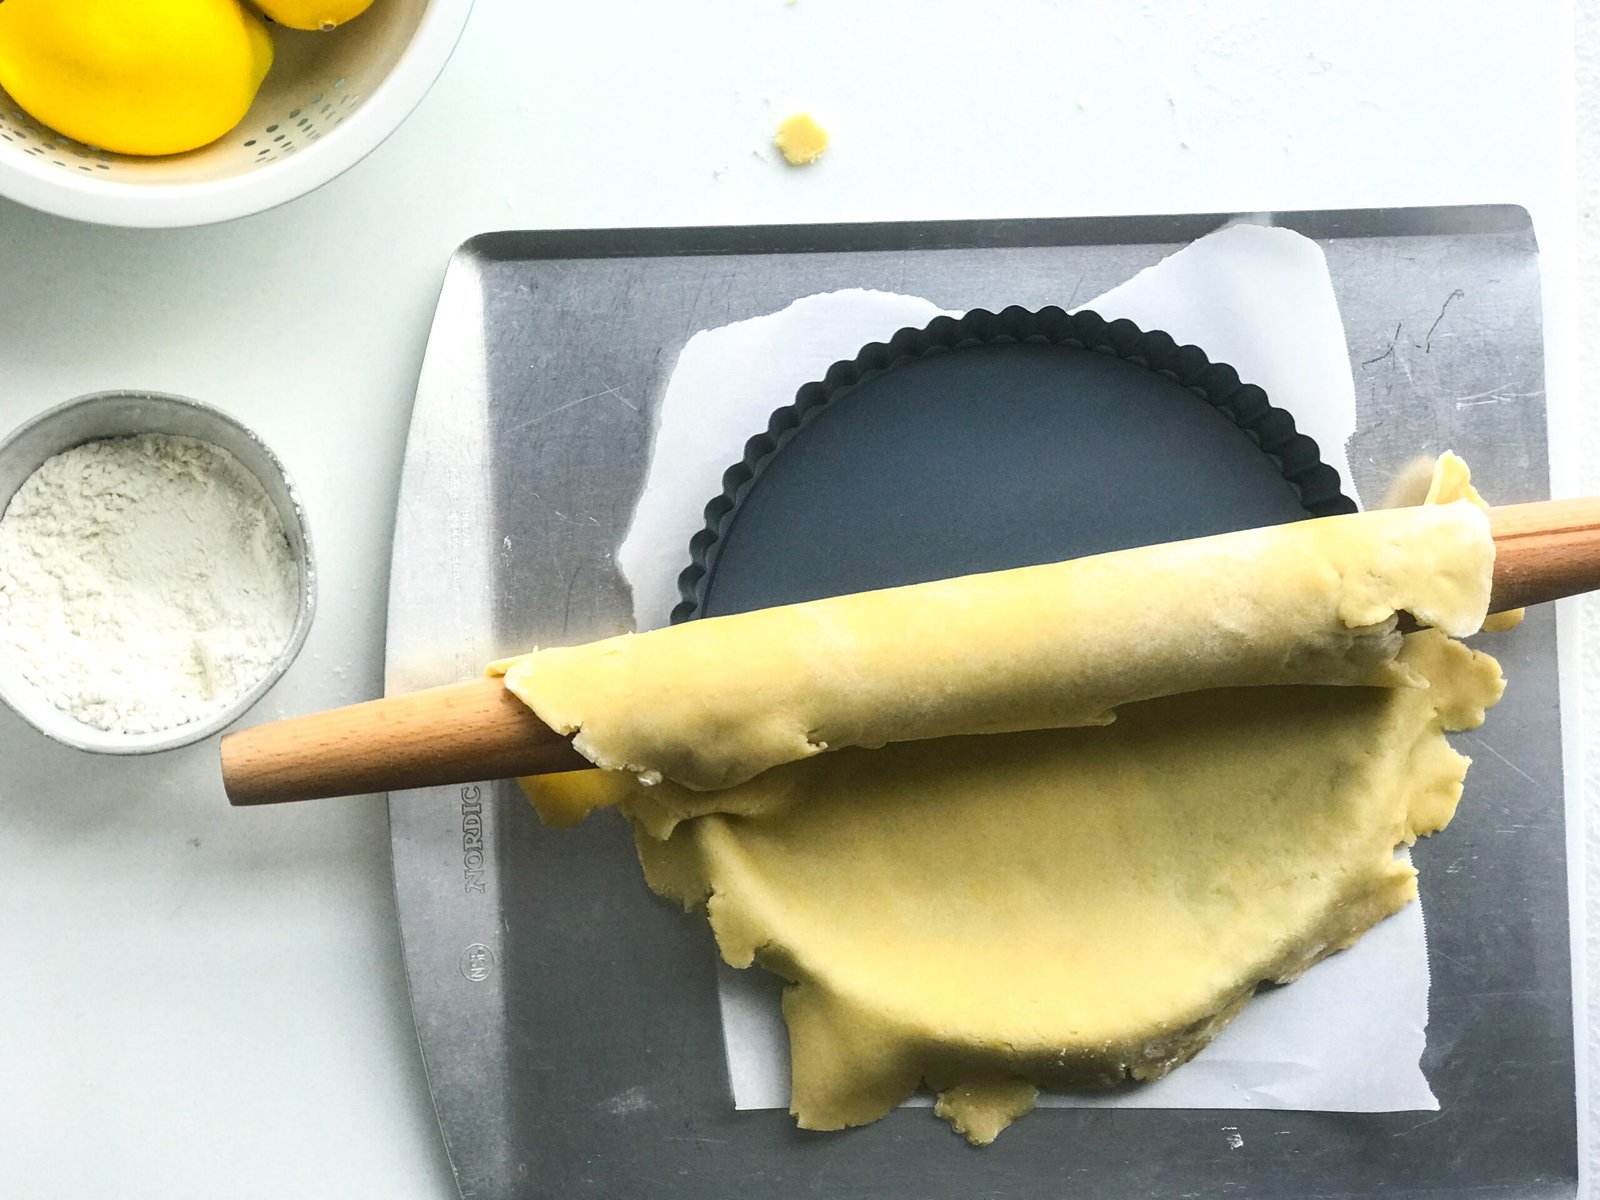
- Carefully lay the dough down on the tart pan so that your dough overlays the sides of the tart pan (see picture in next step).Don’t worry if your dough starts to fall apart, a warmer than usual kitchen will make that happen – another strategy is to roll the dough out onto floured parchment paper, which is what I normally do but I forgot this time. Then you can place your tart pan over it and carefully flip the dough into the pan. To see this in action, check out this pie dough recipe, it’s the same technique.

- If your crust fell apart in the transfer to the tart pan or if you have a hole, just patch it up. The good thing about this dough is no one will see it. It’s helpful to dip your fingers into flour as you do this so they don’t stick to your dough.With floured fingers, press around the edges to make sure all the dough is pressed up against the pan. Also make sure that the crust is as even as possible throughout.
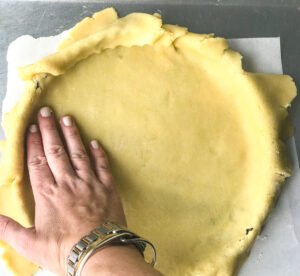
- To remove the excess dough, roll you rolling pin over the top of your tart pan and let the extra dough fall to the side.
- Place in your freezer for 15-20 minutes, the dough should be firm. While you wait, preheat your oven to 375F.
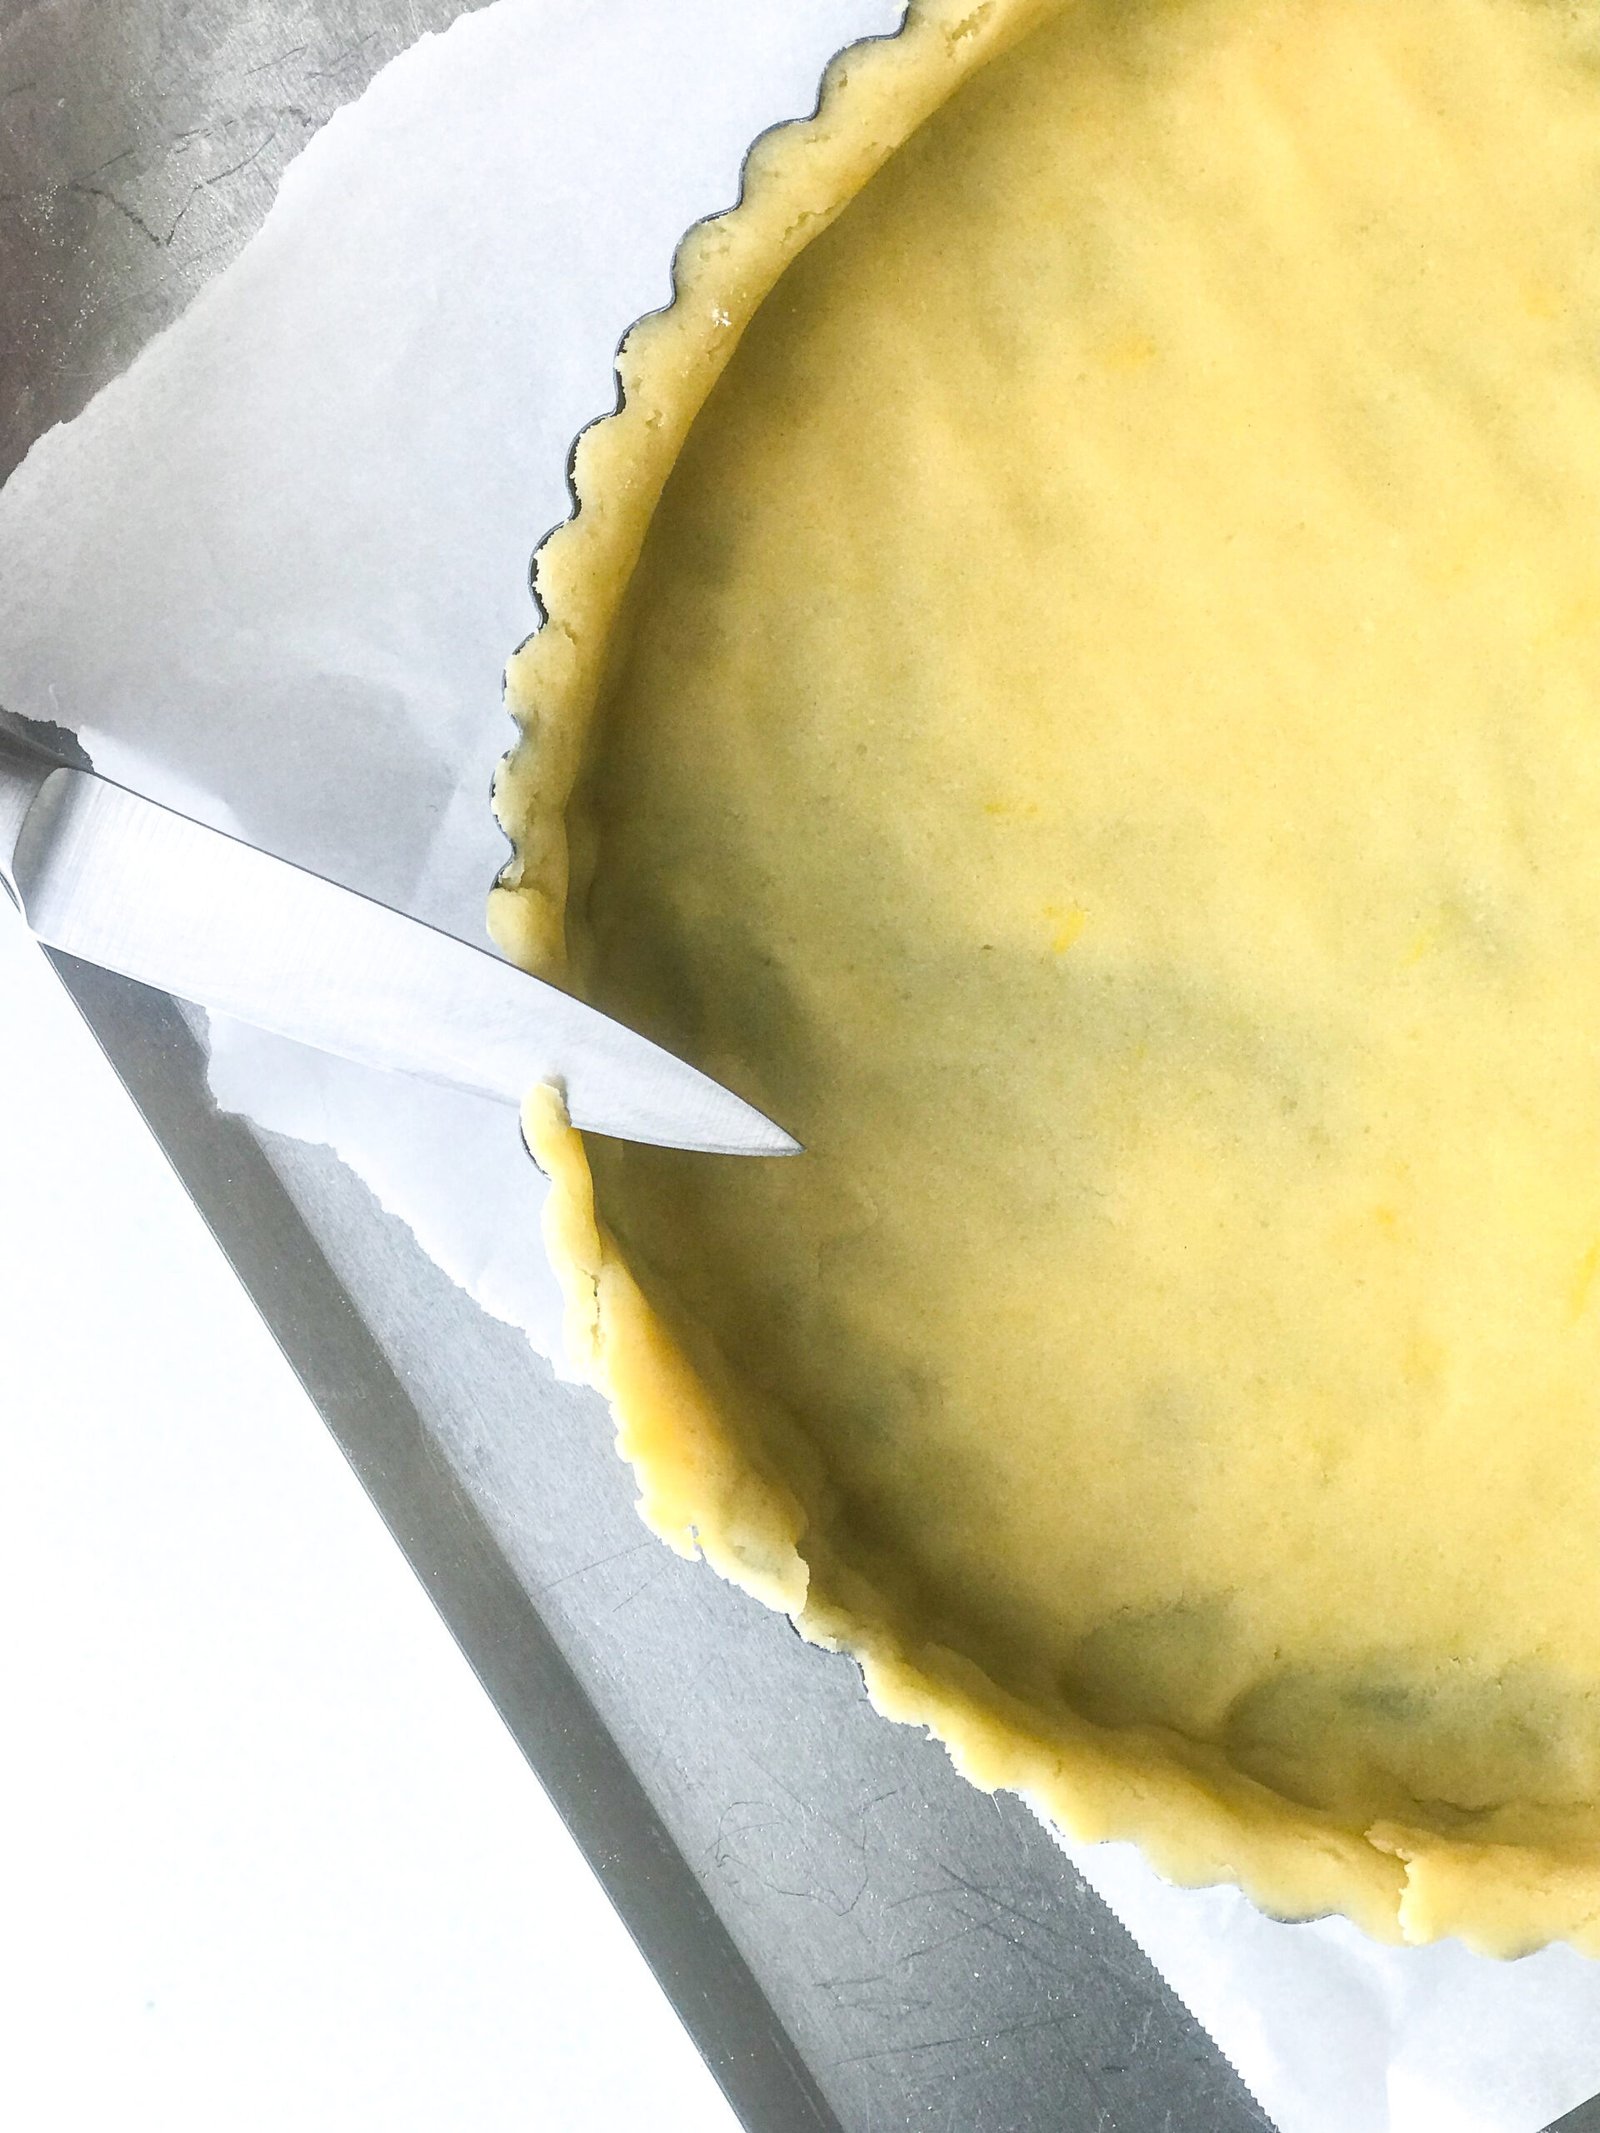
- For the cleanest edges (optional), take a small knife and trim the excess dough off, cutting up and away from the center.


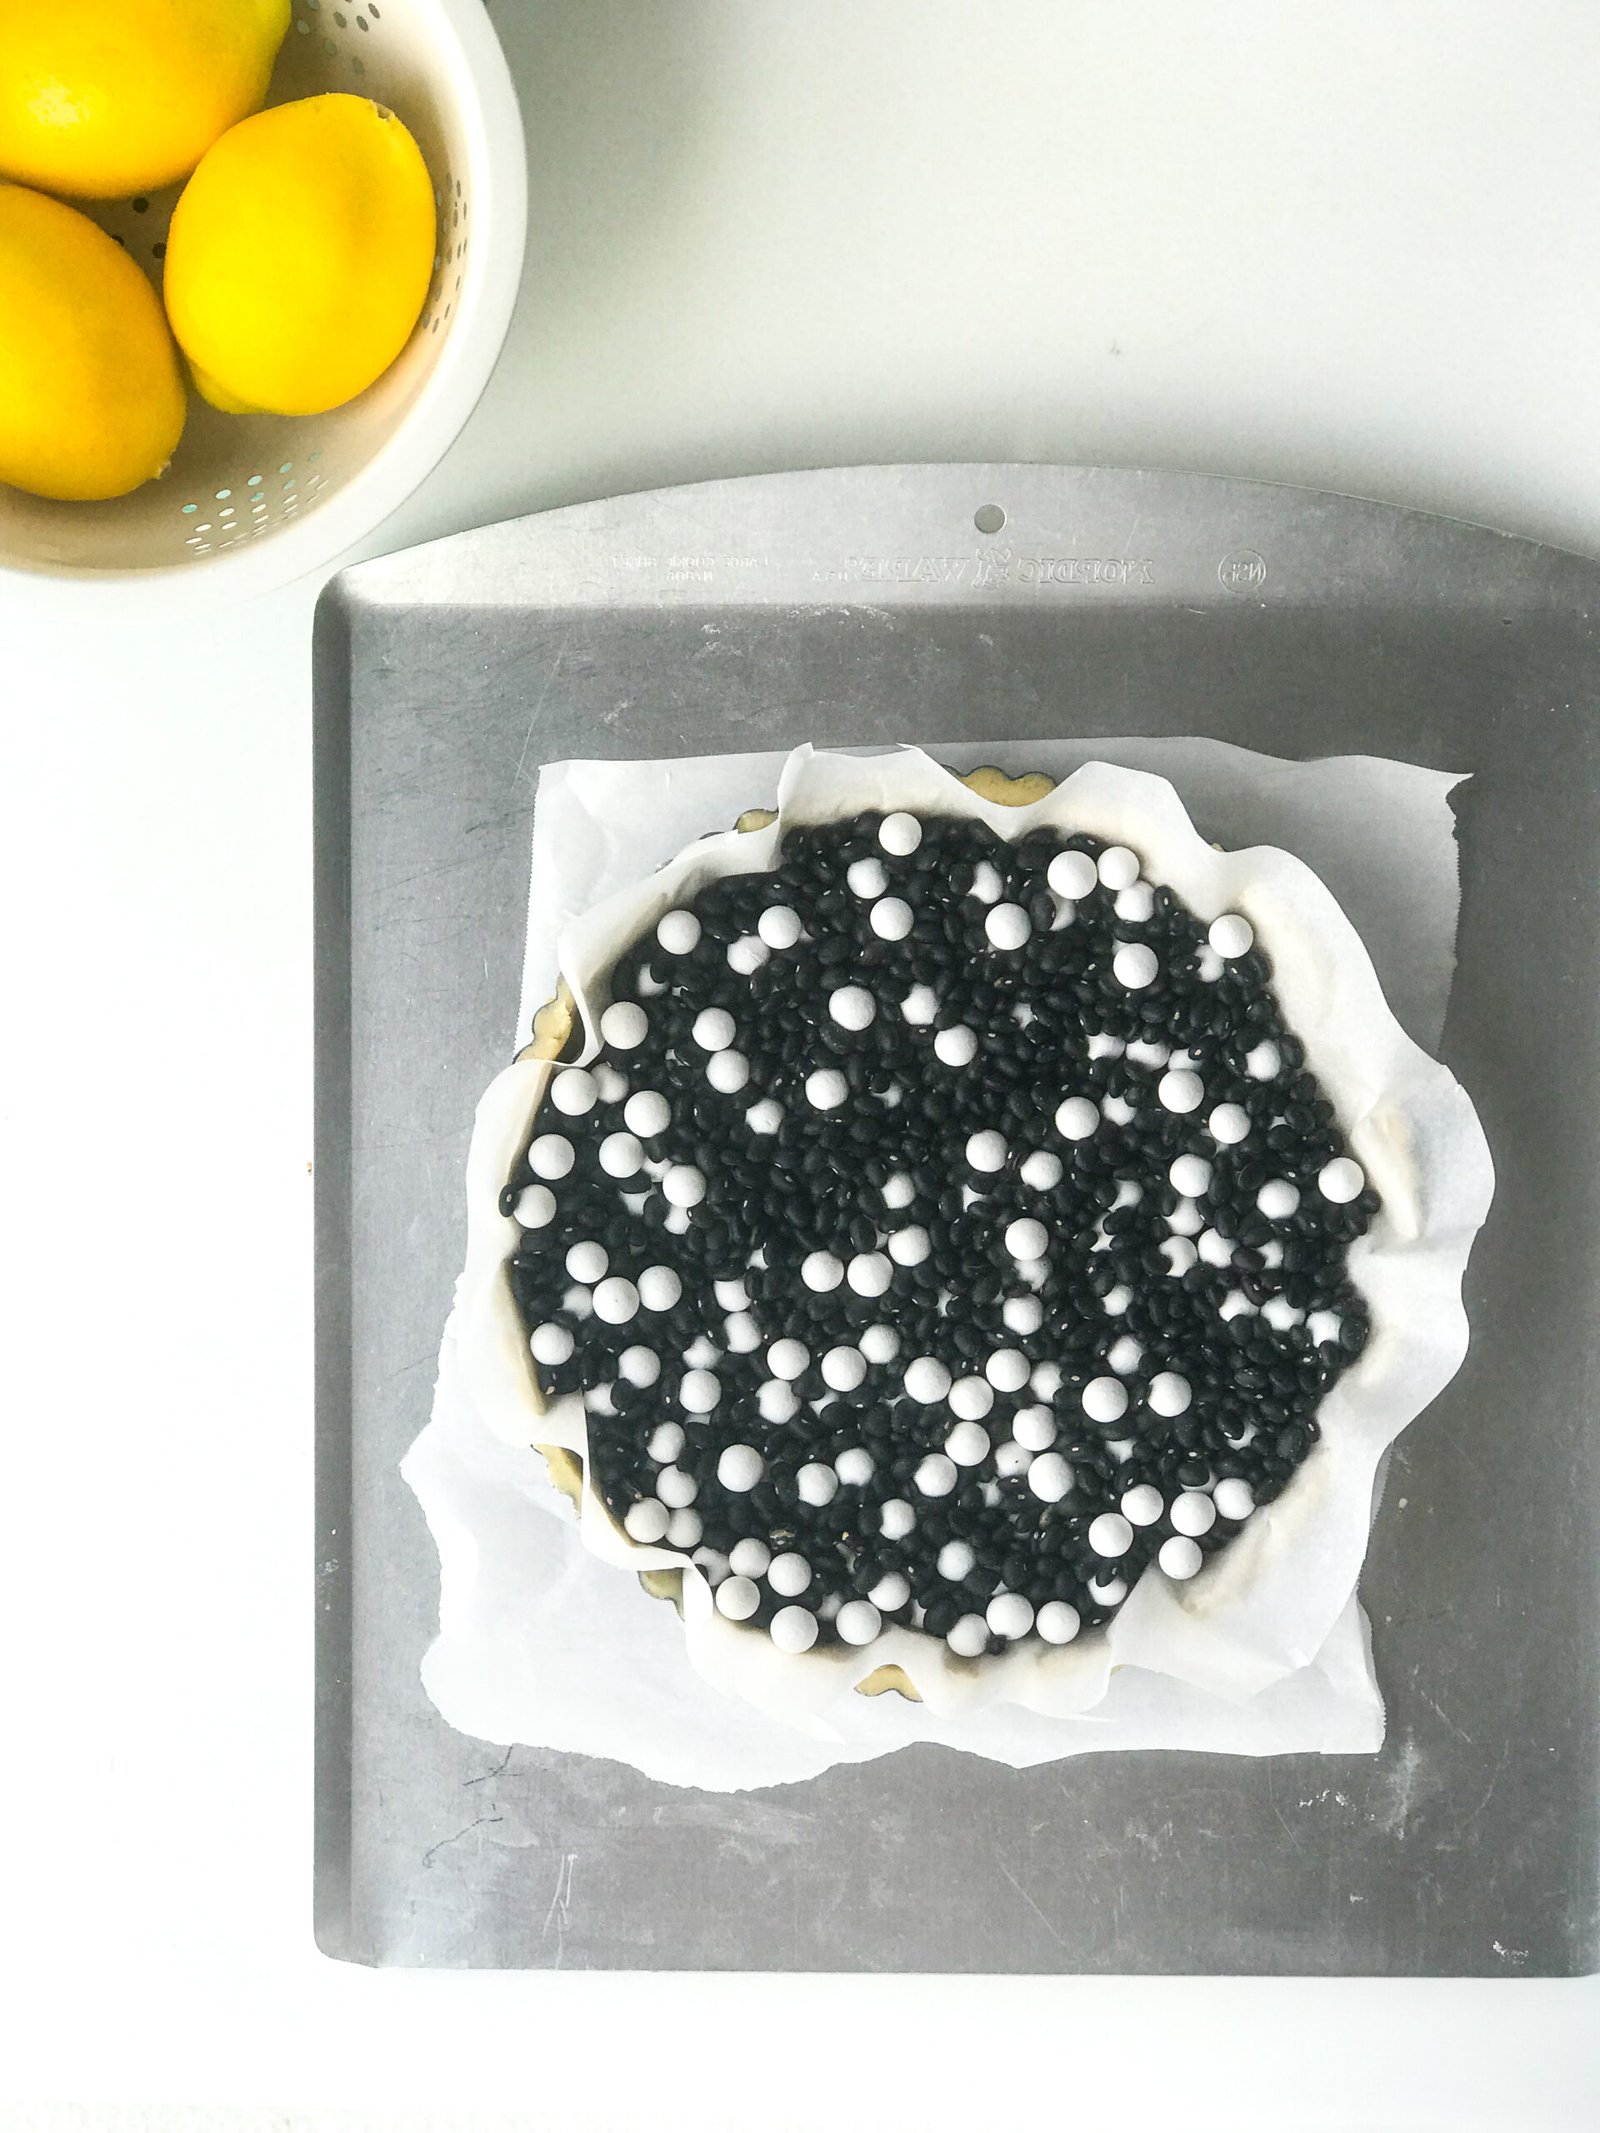
- Line your dough with parchment paper and cover with baking weights or beans. Make sure to gently press around the sides of the pan to keep the dough from rising too much while it bakes. FYI: If you use beans they will not be edible to recook after baking but you can save them for future tarts and pies.

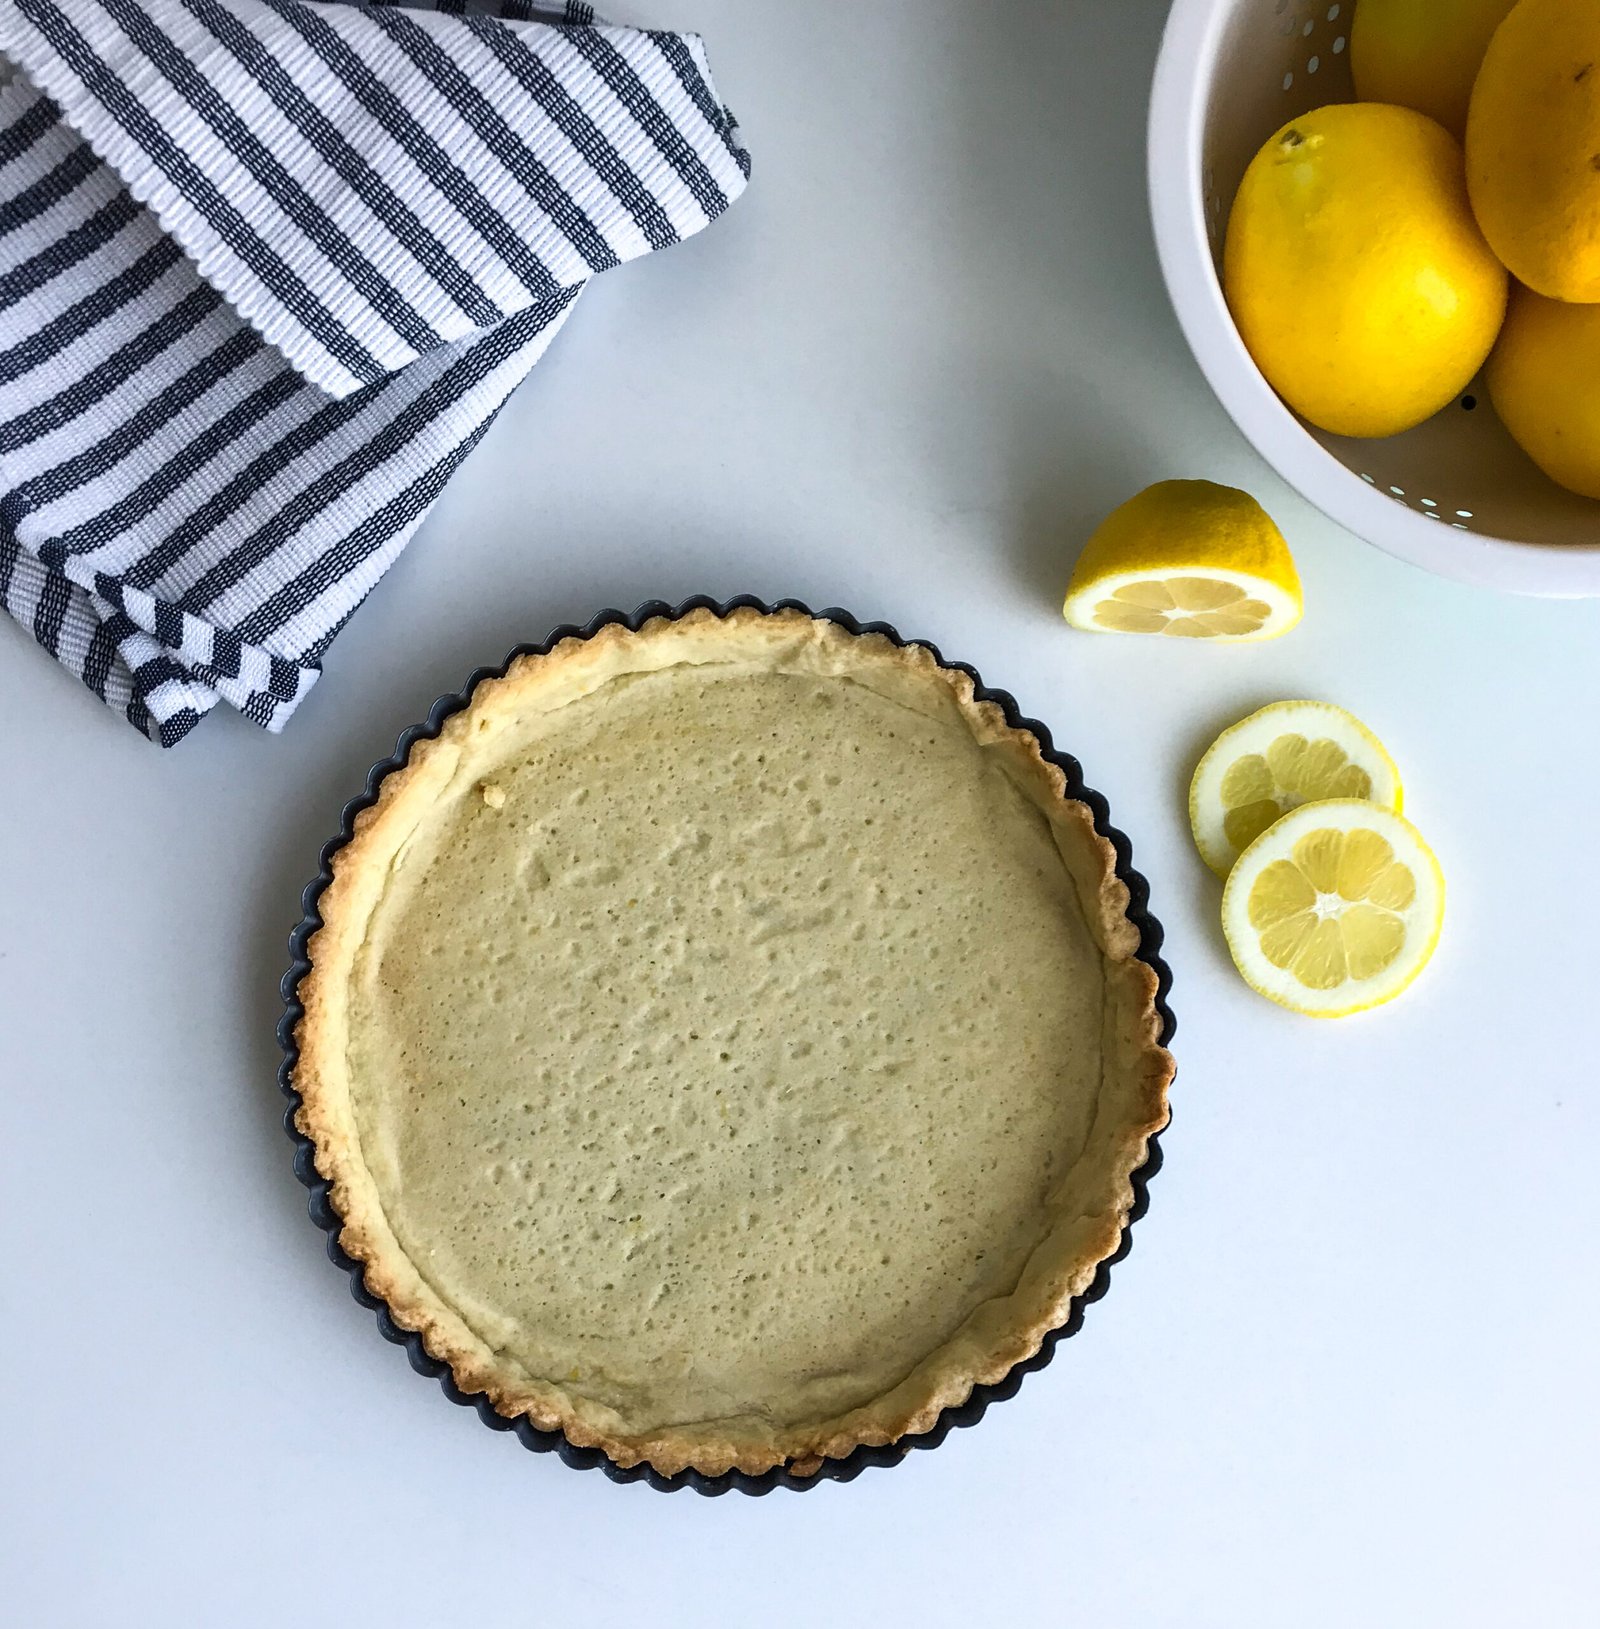
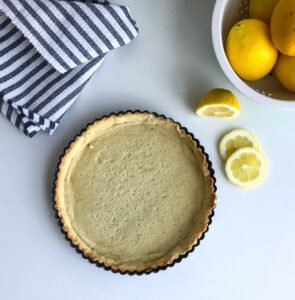
- Bake at 375F for 20 minutes. Remove the weights and parchment paper and bake again for another 10 minutes until the crust is done. It should be dry and slightly colored. Let it cool completely in the tart pan on a rack.


Nutrition
French Meringue
Ingredients
- 3 Large Egg Whites
- ½ tsp Cream of Tarter
- 1 cup Sugar
Instructions
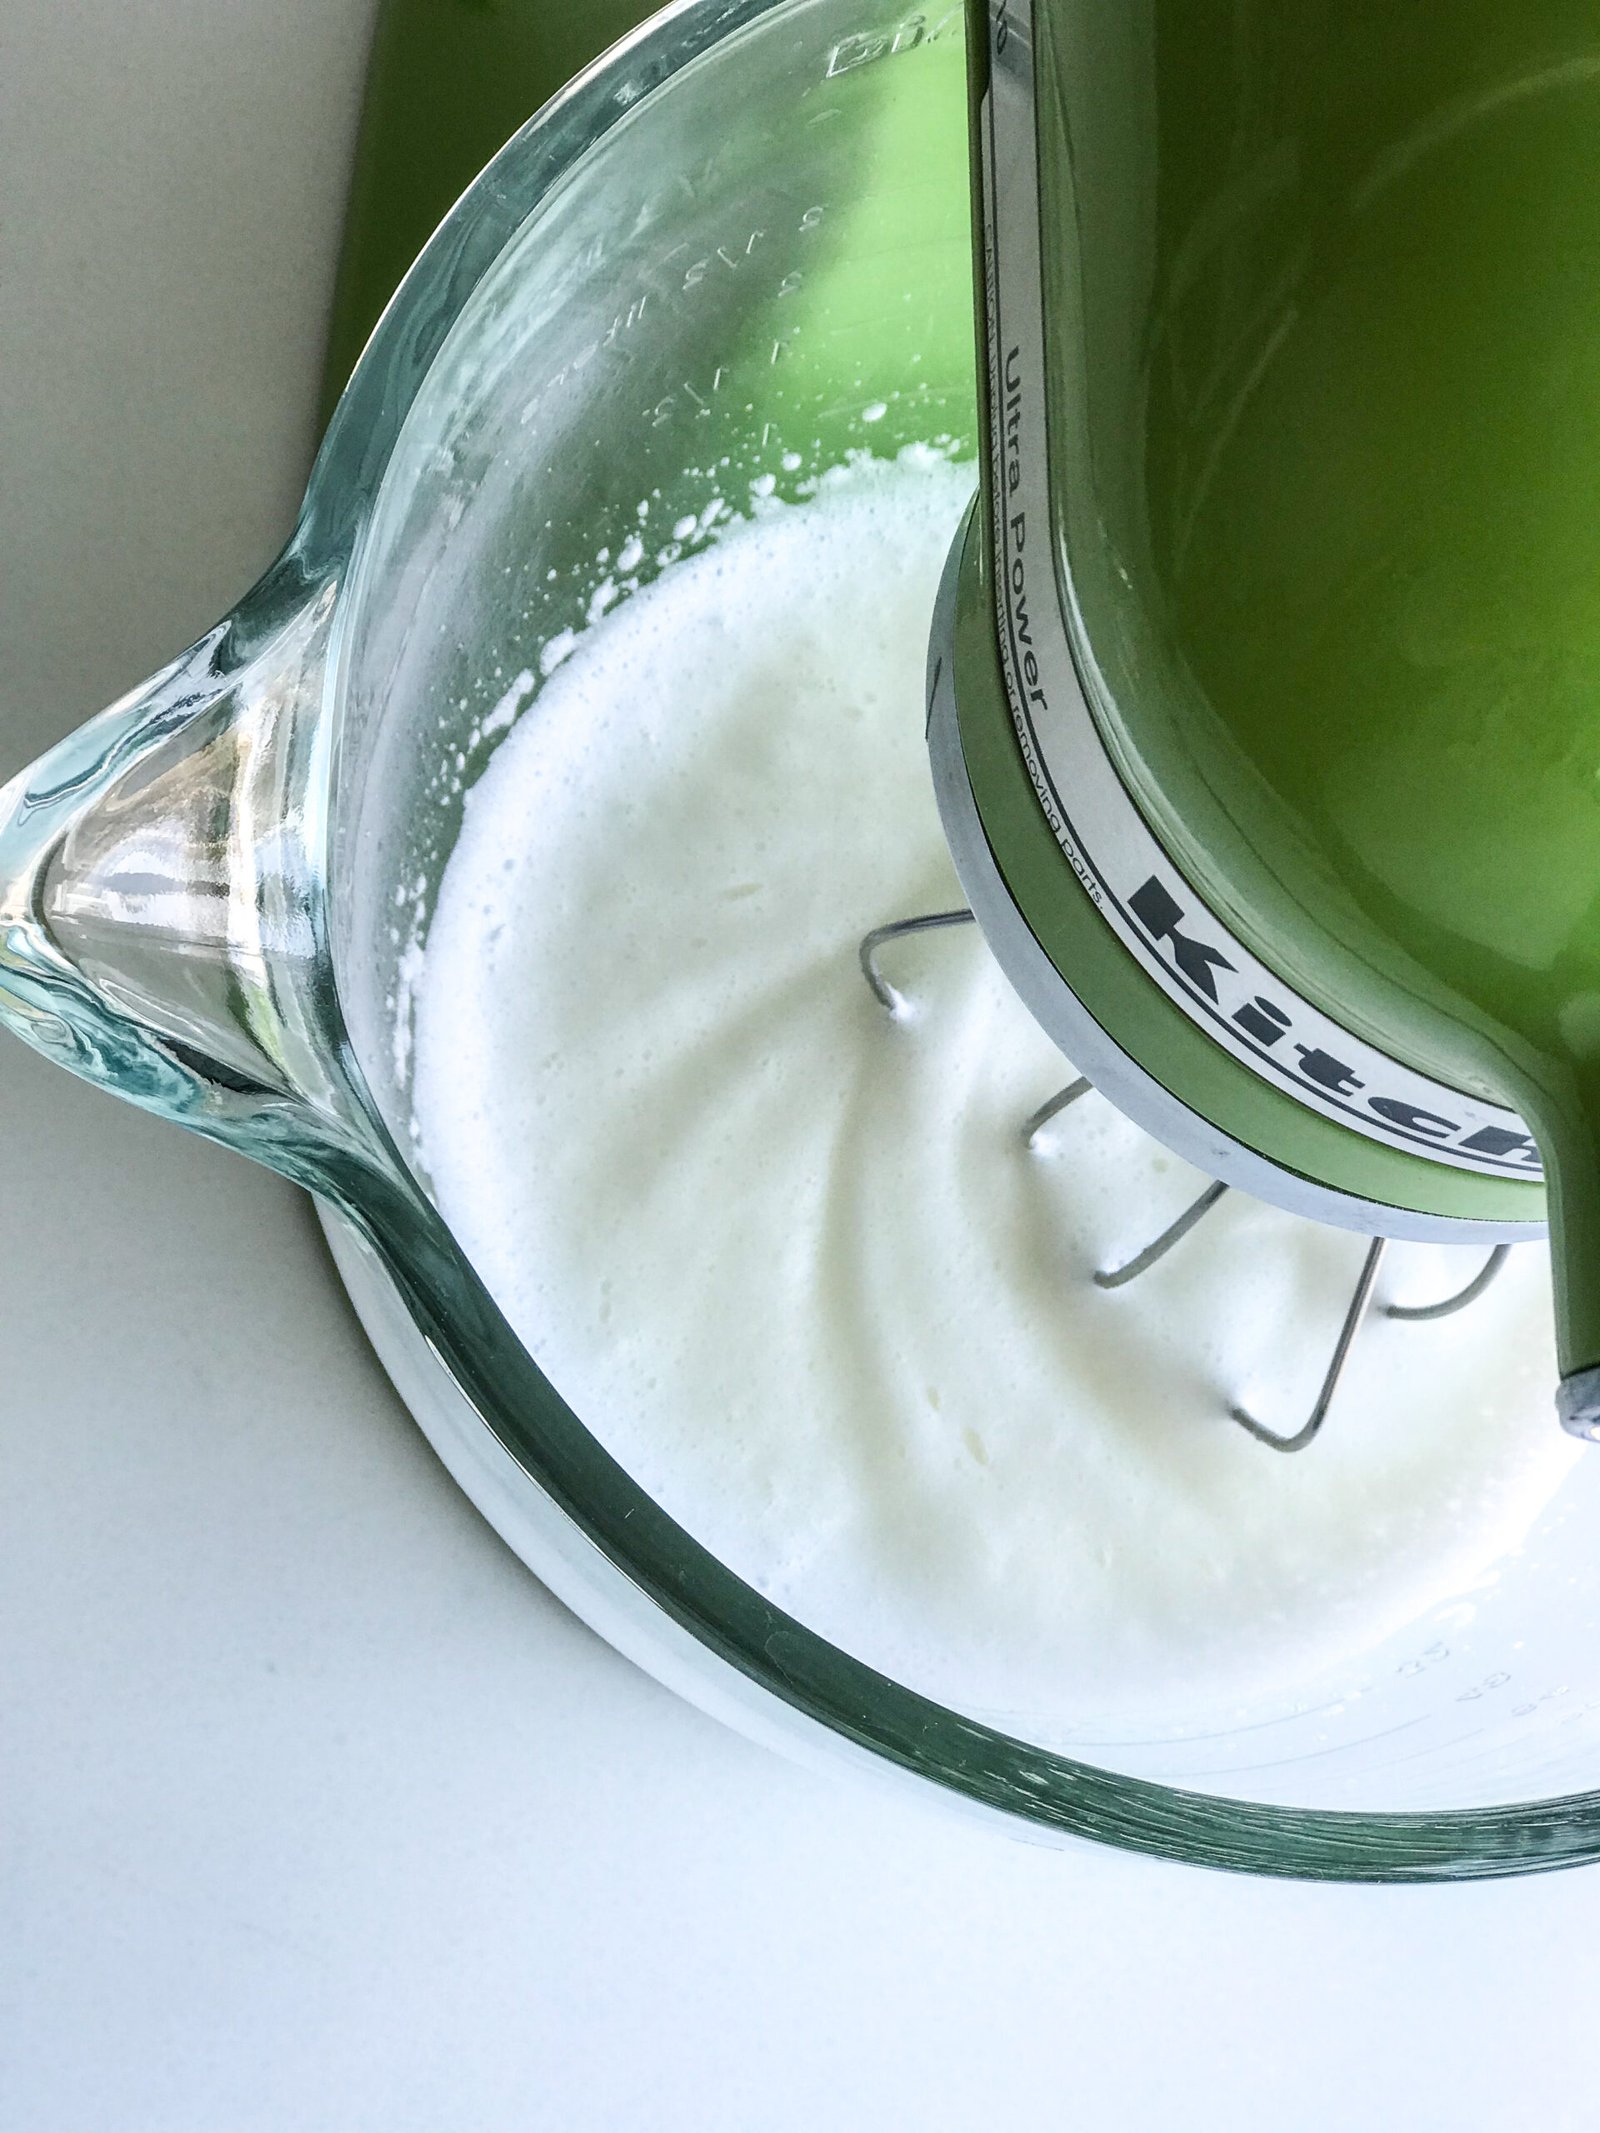
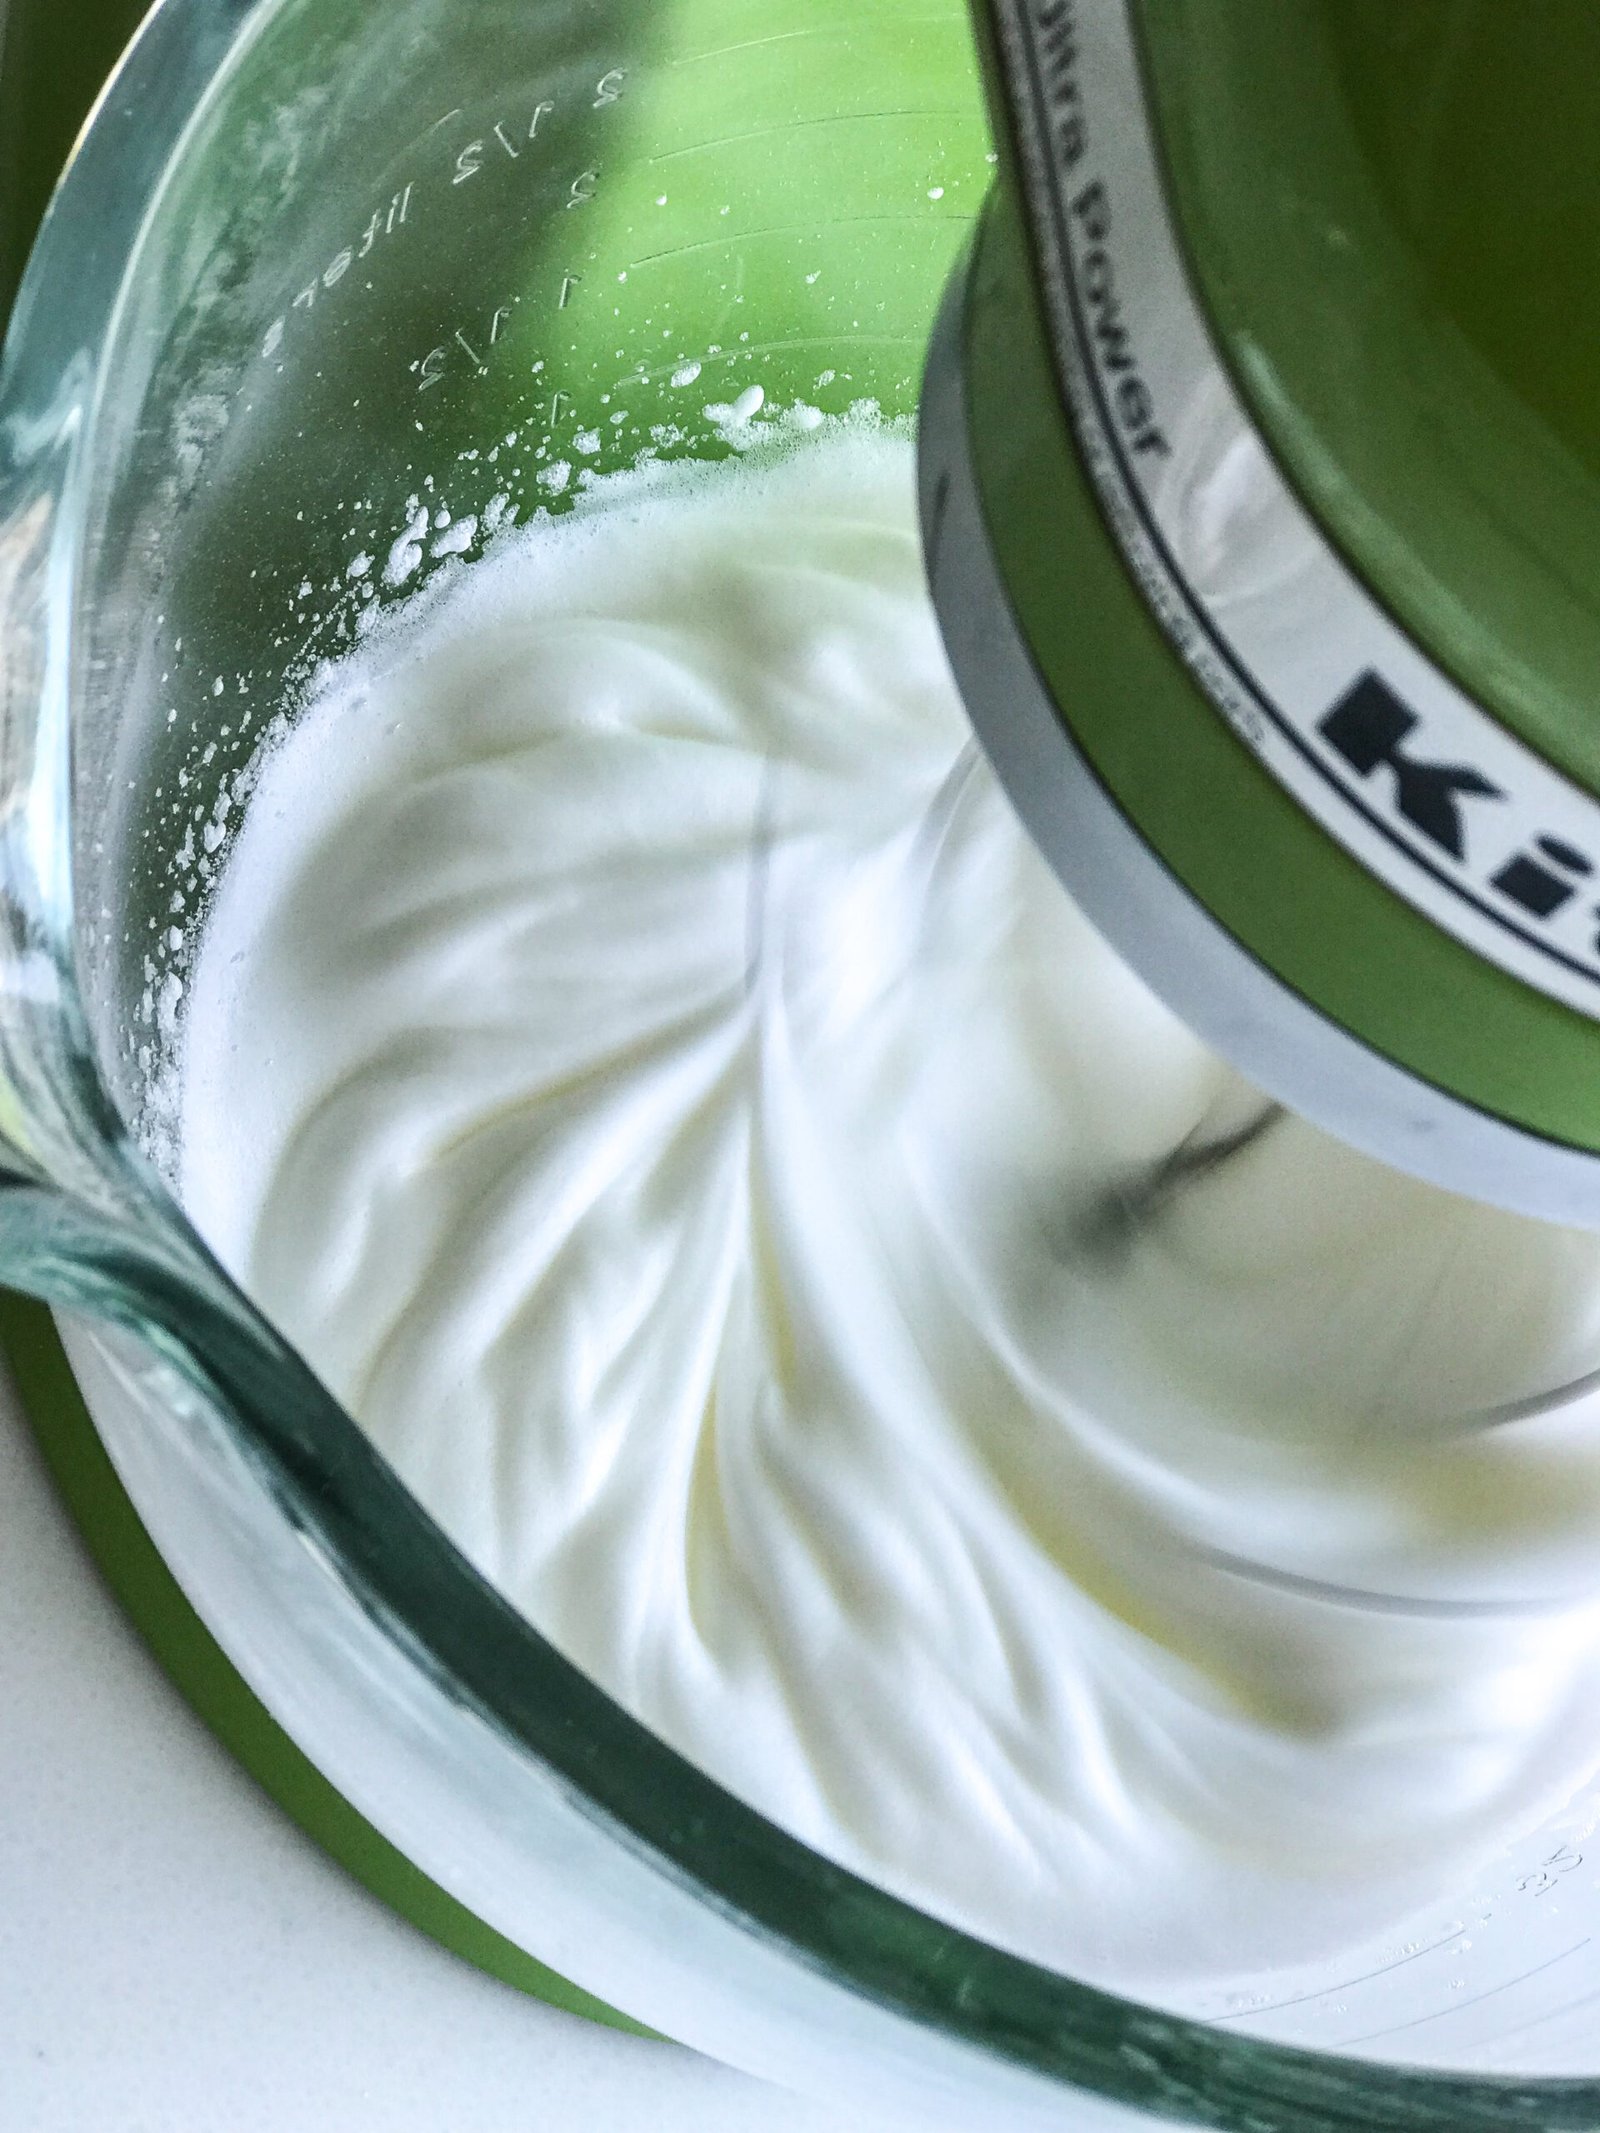
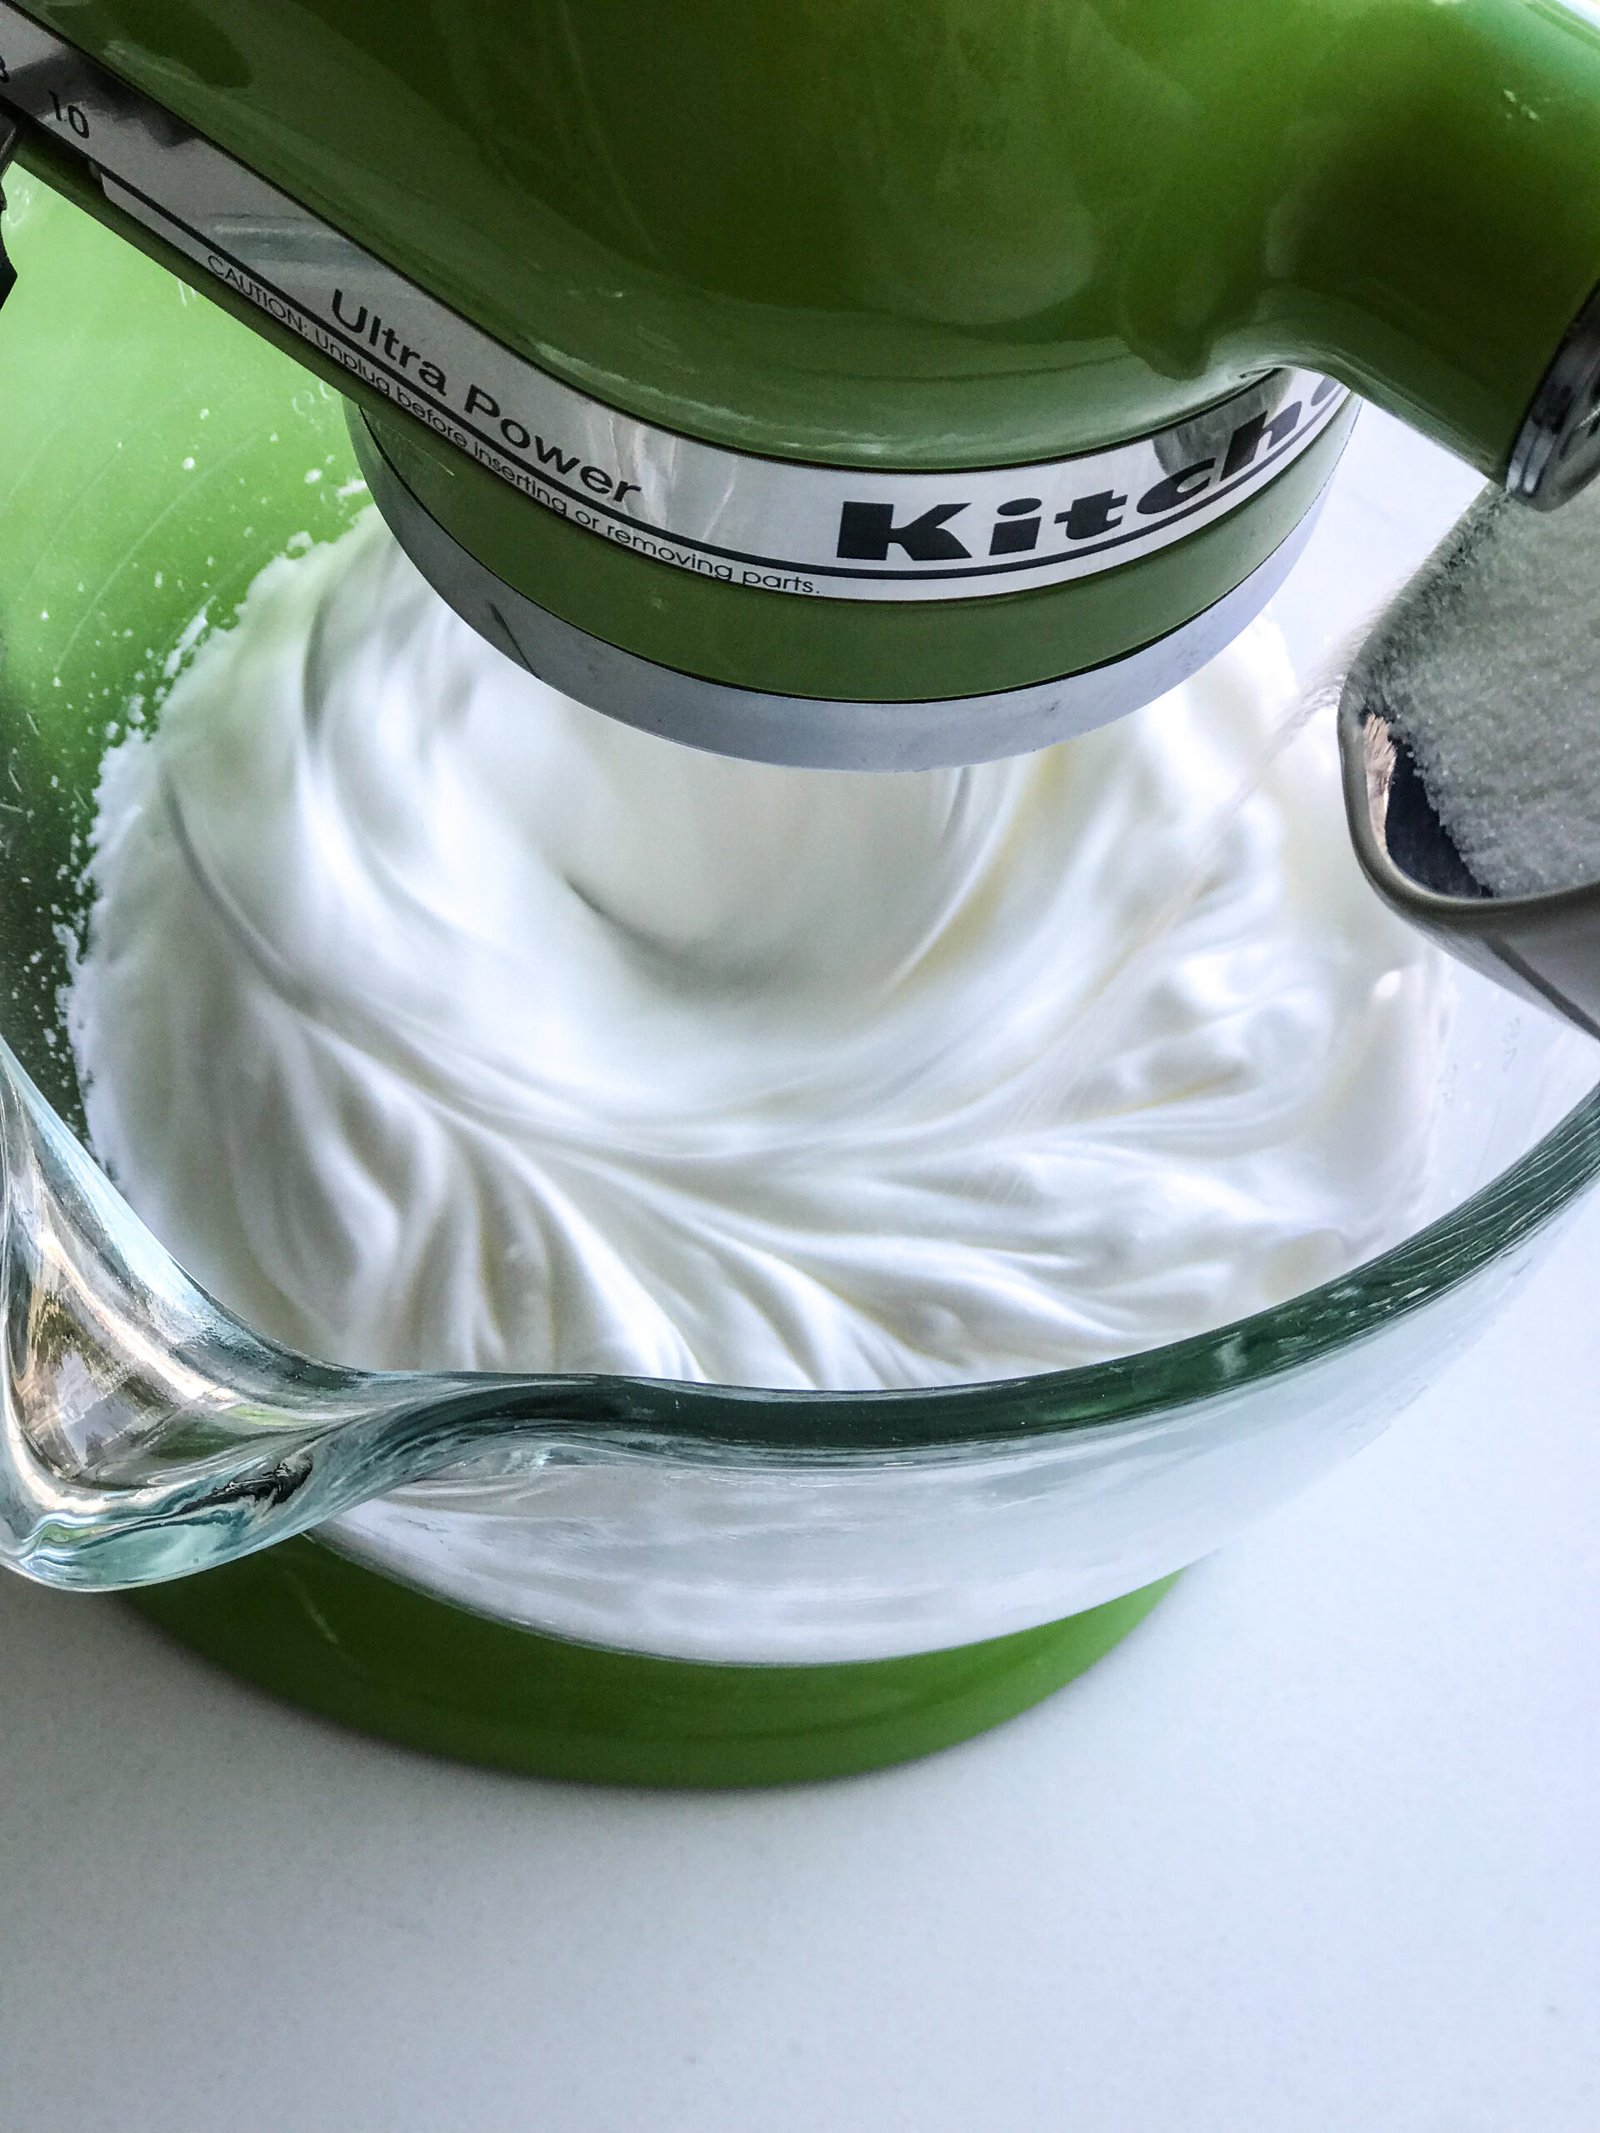
- Using a mixer, on slow, whisk the egg whites and cream of tarter. This will help break up the egg whites. *Make sure you have no sign of yolk in your bowl, this will prevent your egg whites from forming a whipped peak.
- Increase your mixer speed until a soft peak forms (see #3 & #4 in the pictures below). Slowly, one spoonful at a time, add your sugar, gradually adding more at a time as it starts to get thicker until it’s gone.
- Beat until a stiff peak forms and the sugar is completely dissolved (see #5 and #6 in the pictures below).
Step by Step in Photos:


Nutrition
Putting it all together:
Once the tart shell is completely cool, spread out your lemon curd. Pop it out of your tart pan, usually you can press up on the bottom which will pop up and the ring will slide off.

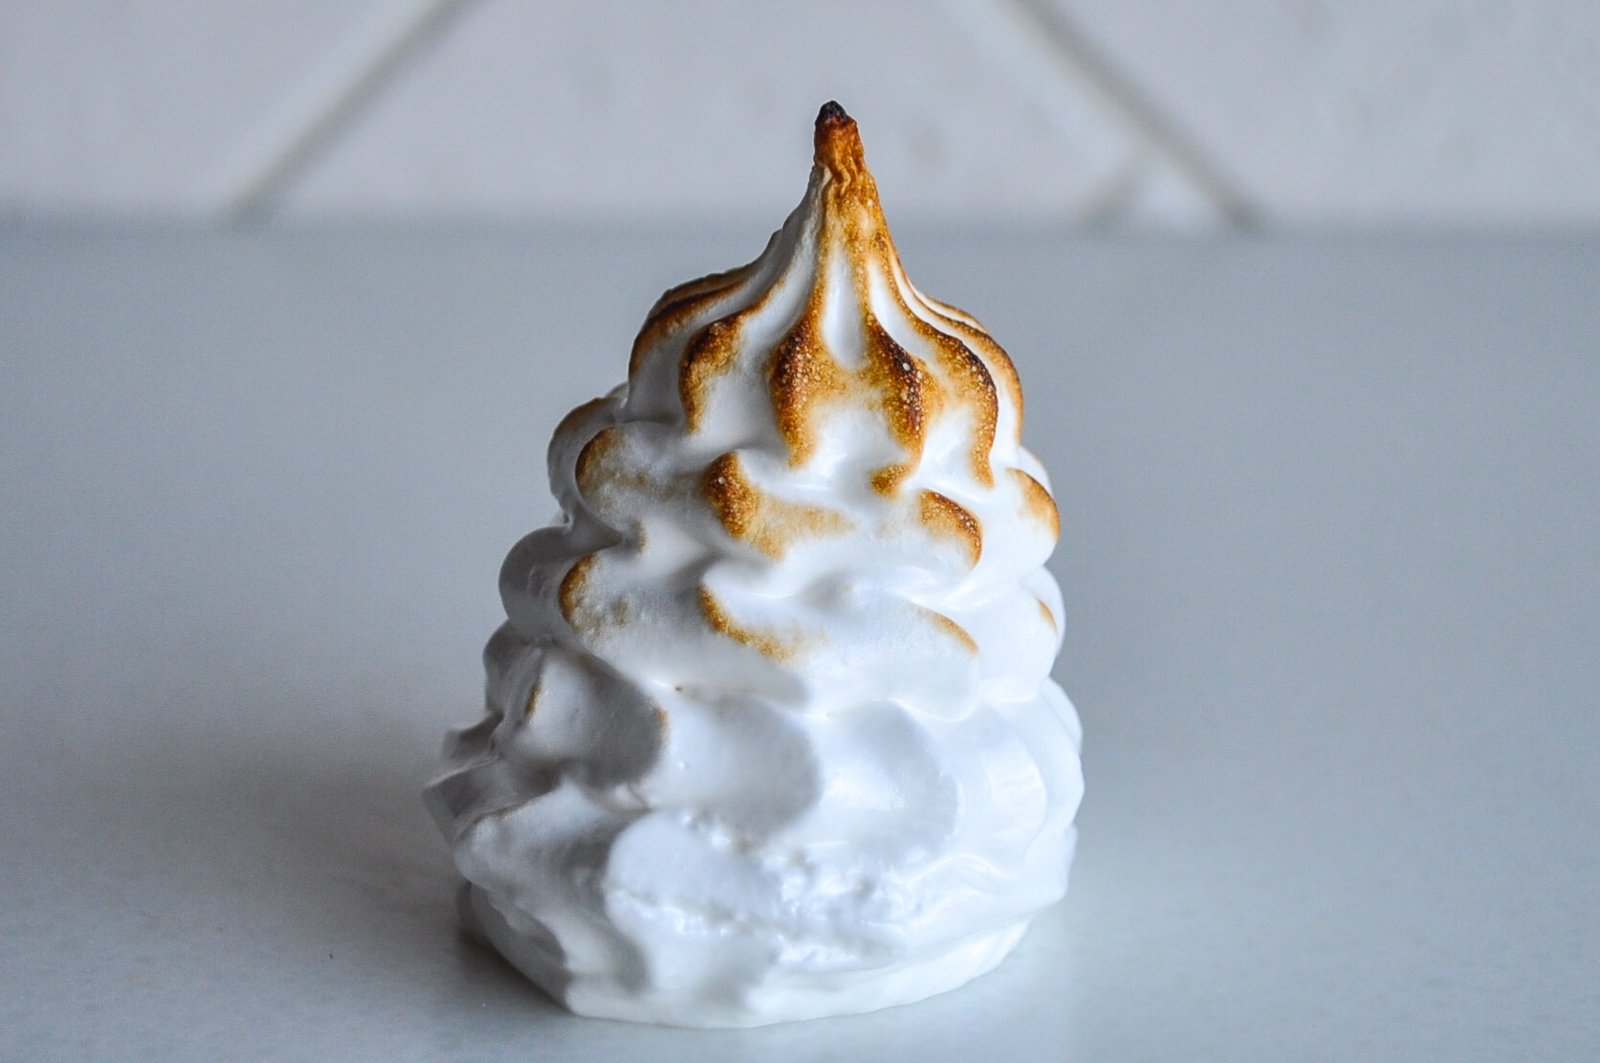
Serve as is or add your favorite fresh fruit and French meringue for decoration.

To brown the meringue you will need a butane torch, it’s not necessary but it does look pretty. I provided a link to one from amazon, the gas is not included.
Notes:
Lemon curd can be made a few days in advance. Store it in the refrigerator in a container with plastic wrap pressed down onto the curd to seal out any air that would create a crust. Stir before using.
Tart Shell dough can be made anytime in advance. If you make it more than a couple days before, freeze it until you need it. You can store it in the refrigerator 2-3 days. To defrost, place it in the refrigerator a day or two before you need it and let it defrost slowly. You can bake the tart shell the day before, after it is completely cool, store it loosely wrapped in plastic wrap.
French Meringue should be made the day you are going to have the tart for dessert.
Storing the Lemon Curd Tart: Make sure the tart is chilled before serving. If the lemon curd comes up to room temperature during the decoration process, it may run when you cut into the tart, place it back into the refrigerator until you’re ready to serve. If you have any leftovers, store uncovered in the refrigerator.


Lovely looking recipe!
Is that an 8 inch tart pan? I have a rectangle tart pan ( roughly 8 x 11) and am trying to determine how much crust and filling I will need to make.
It’s 9in, when I make mine lemon curd recipe for 3 cups, I usually have some left over so you might have enough for 8×11. I would make the crust recipe, and since it makes 2 crusts, you can just use what you need. The good thing about this crust is that because the butter is completely incorporated into the dough you don’t have to worry about over-rolling, so you can roll out what you need and then form a disk with the leftovers to freeze for another day. 🙂 I hope you love this recipe!