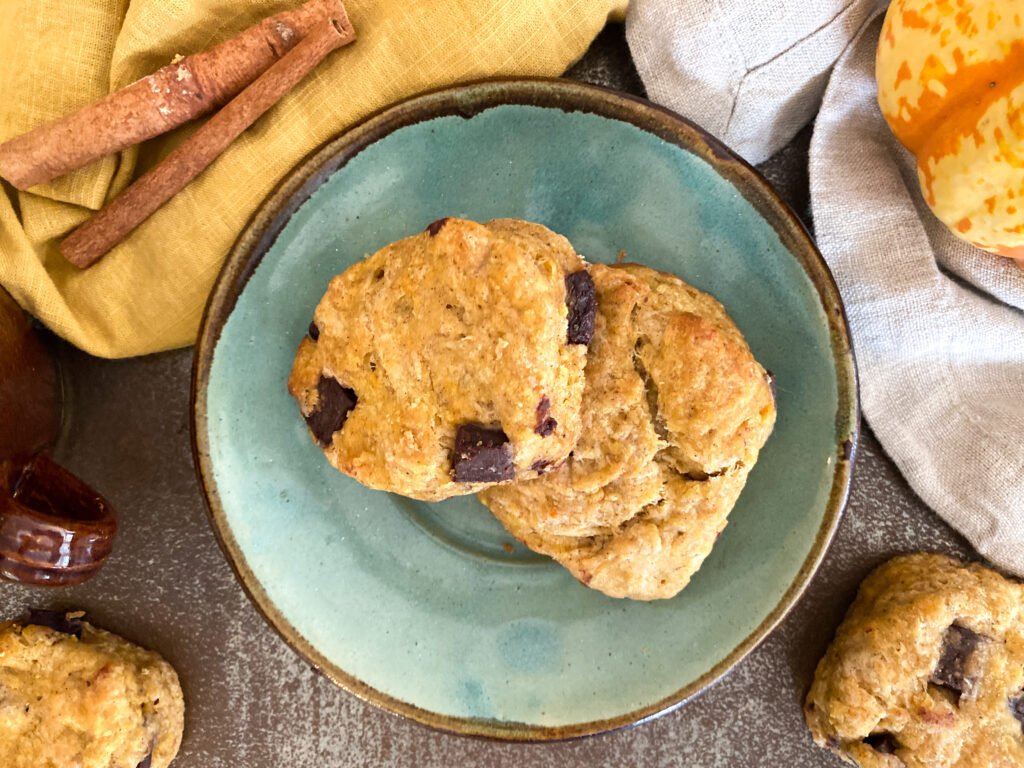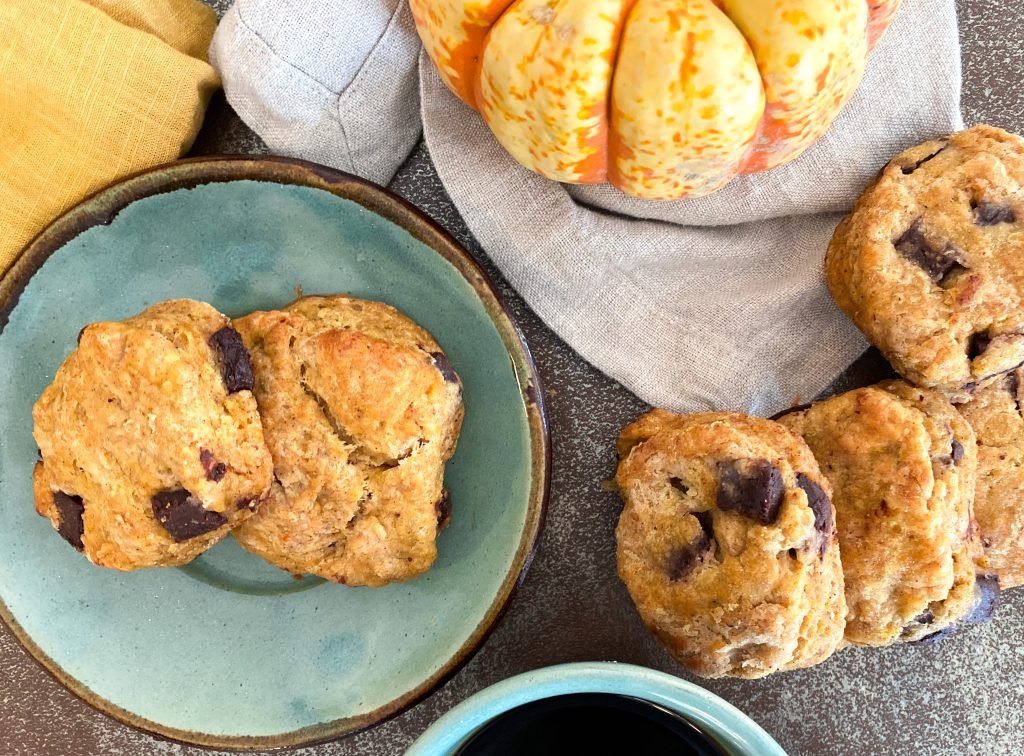
Pumpkin season is in full swing and we are here for it, I whipped these soft, scrumptious chocolate chip pumpkin scones up and they were a hit! The recipe is quick and easy, I promise, I made these up 20 minutes before having to run out the door for a birthday party.
Pumpkin is such a unique flavor and I think I’m more drawn to the warm spices that a lot of pumpkin fall recipes call for rather than the pumpkin itself, I would never order a PSL, I’m more of a butternut toffee or the new trending apple caramel macchiato order but my family loves pumpkin and these are the perfect pumpkin treat.
Now that we have a preschooler, I pay more attention to the ingredients in items I may want her to take to school, these are nut free & dairy free so you can pack these pumpkin scones up for a surprise lunchbox dessert.
Keeping the Ingredients Cold
You will notice that in this pumpkin scones recipe it calls for buttermilk and butter to be cold, this just means, keep them in the refrigerator until you are about to use them. The colder these two ingredients are the better – the goal is to keep the buttermilk from warming up the butter. The science behind cold ingredients in scones is because during the baking process the butter will expand creating air pockets, making these pumpkin scones soft and fluffy.
You will see that when you add in your cold butter you will use a pastry cutter or a fork to cut the butter into the flour, this will ensure that your butter does not melt or become homogeneous with the dough, it’s essential that there are peanut m&m size butter chunks throughout.

Canned Pumpkin
There are two different kinds of pumpkin puree on the grocery store shelves these days. There is pure pumpkin puree, or something to that nature, the wording may be different depending on brand. Then there is pumpkin pie filling, which comes complete with spices and seasonings already added into it so you can dump into a crust and bake. Both cans look surprisingly the same, usually the same photo and print so make sure you’re on high alert and paying attention to the can you grab, we’ve all looked at one and grabbed the other before…FYI grocery stores so accept returns. For this recipe and for most recipes, you will want the pure pumpkin puree.


Chocolate Chip Pumpkin Scones
Ingredients
- 2 cups Flour (plus some for dusting counter)
- 1 TBSP Baking Powder
- ¼ tsp Baking Soda
- ¼ tsp Salt
- 2 tsp Pumpkin Pie Spice
- ¼ cup Brown Sugar
- ½ cup Cold Butter
- ½ cup Cold Buttermilk
- ½ cup Cold Pumpkin Puree
- 2 tsp Vanilla Extract
- 1 cup Chocolate Chips or Chunks
- 3 TBSP Butter – Melted
Instructions
- Do not preheat your oven just yet, we want to combine the ingredients first to keep your kitchen cool.
- In a large bowl, whisk together your flour, baking powder, baking soda, salt, pumpkin pie spice, and brown sugar.
- In a separate bowl, whisk together your buttermilk, pumpkin puree, and vanilla extract.

- Add in your cold butter to your dry ingredients, using a pastry cutter or a fork, cut your butter into your dough until the butter is in crumbles about pea size, set it aside.

- PREHEAT your oven to 425F. Line your cookie sheet with parchment paper or a silicone mat.
- Pour your pumpkin mixture into your flour and butter and add in your chocolate chips or chunks. Fold to combine, do not over mix. It may be easier to use you hands, but make sure to keep your pea-size butter lumps, do not try to smooth them out (see blog notes for additional explanation).

- Sprinkle your counter with flour and pour your scone dough out onto the counter. If it's wet and sticky add another sprinkle of flour to the top to keep it from sticking to your hands or the rolling pin. You may have to continue to sprinkle with flour between rolls until it's not sticky.
- Roll out your dough until it's about ½ inch thick. Using a small glass rim or a biscuit cutter, cut out your scones. You can also cut them into the traditional triangle shape.

- Place them on your cookie sheet so that they are touching side by side. You will get a higher rise if they are nestled up to each other.
- Place in the refrigerator for a quick cool down.
- Melt your butter.
- Once your oven is preheated, take your scones out of the refrigerator and brush on the melted butter until the tops are coated.
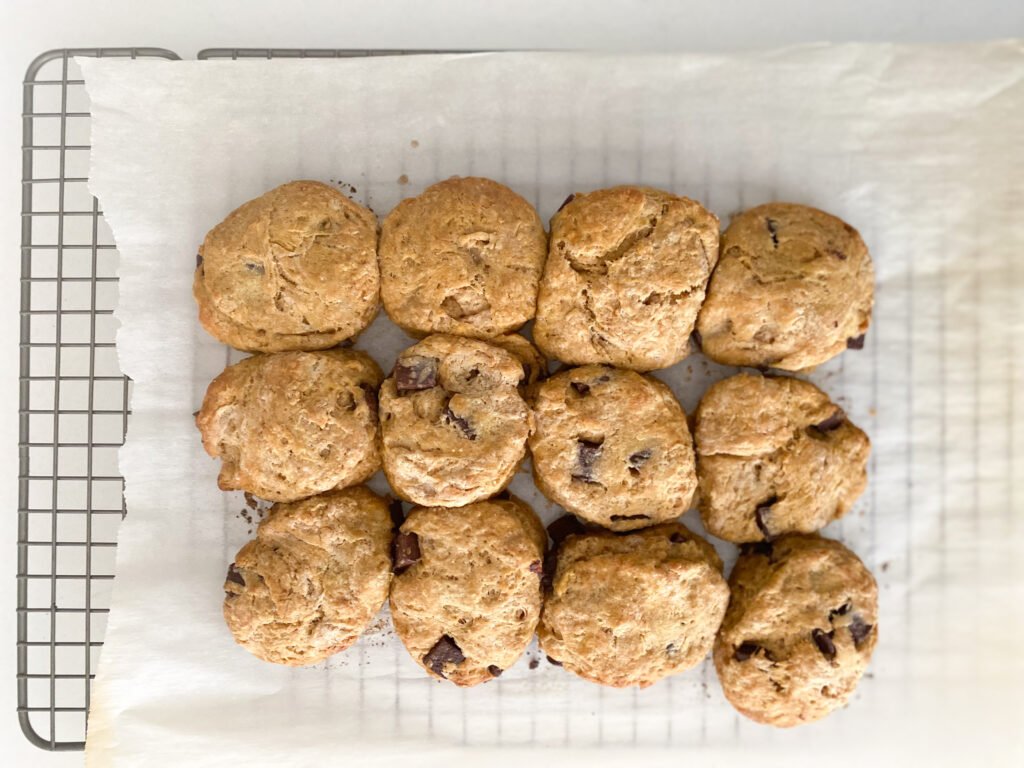
- Bake for 15 minutes, turning the cookie sheet after the first 7 ½ minutes.

- Let them cool for a few minutes and then transfer to a wire rack to complete the cool down.