Backyard gardening 101 – here it is! All you need to know to take the leap and try it yourself. There is a lot of trial and error but also a lot of fun and success.
First a little backstory and introduction because we are not experts but we are here to help get you started so you can make it your own.
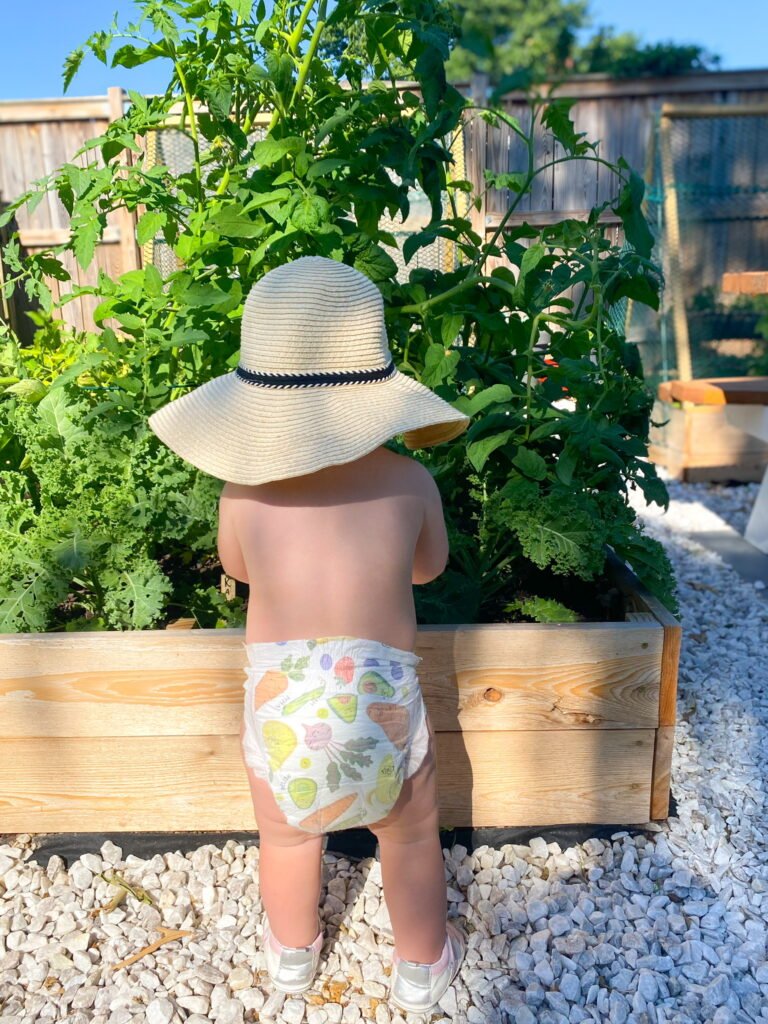
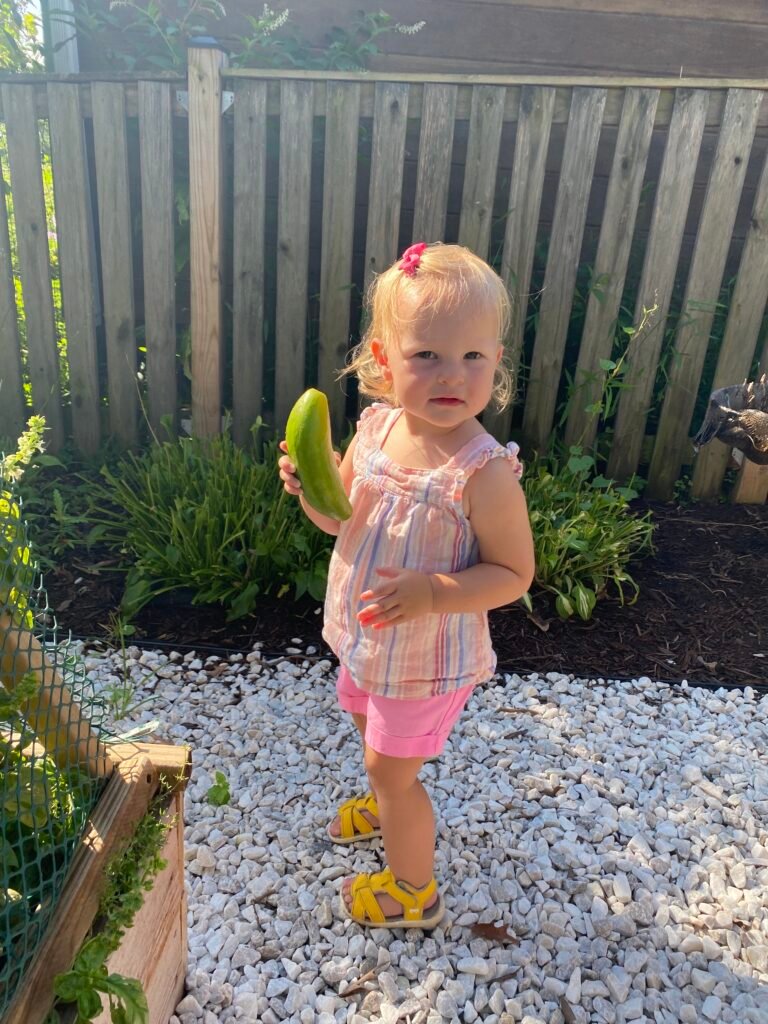
After living in DC for more than a decade, in January 2020 we decided to move to the Suburbs to raise our family, mostly because it was cheaper, we very much miss city-living but the suburbs (and the backyard) definitely has it’s perks, like our backyard garden. You can say it was a pandemic-born hobby, sort of. In my apartment I always grew herbs, but now it was time to expand to fruits and vegetables and “live off the land!” – just kidding, that will never happen but it is extremely fun to walk out and clip herbs, cut lettuce and other vegetables for a snack, dinner or a to beat the heat with a homegrown cucumber margarita.
Going out early morning with a fresh cup of coffee just to walk around the garden is my favorite way to start the work day. Watching the girls pull out the carrots, strawberries, peppers and kale to eat on the spot is pure happiness.
In 2020 when the playground closed, we cleared space in our backyard for a swing and slide playground area.
In 2021, inspired by several different instagram accounts we cleared more space for a walk-around garden and a new love for gardening was born.
In 2022, we added more boxes, more herbs and leafy greens.
In 2023, we are improving and finding our groove and adding garlic and shallots to the mix.
We live in Maryland
For reference of season/temperature and we have to worry about squirrels, rabbits, and deer. We live in the Silver Spring, MD area, the DMV, the Mid-Atlantic. There are frost warnings until late March or early April. So we start the seeds indoors and move them outside once we have had a consistent week or two without temperatures below 40F, usually sometime in April.
Companion Flowers and Another Desperate Hail Mary
There are two type os companion flowers, those that keep unwanted visitors away such as deer, squirrels, rabbits and the second type help your plants grow. We have not knowingly succeeded with this area of gardening, but we continue to try.
The first year we lined our garden with marigolds and truth be told, I have no idea if it works. We also planted basil and tomatoes together, but we under-estimated the space needed and it did not work, we had to transplant the tomatoes bushes and that was an unsuccessful move.
The second year, the squirrels, being the savages they are, ate almost all of our tomatoes. Desperate for one or two ripe tomatoes to harvest, a friend told me to put a bowl of water at the bottom of the plant and they would stop. It was, I think too late last summer to know if it really worked.
This year, we are trying the tomatoes and basil together again to check it out. We also decided to throw caution to the wind and plant the cucumbers without a topper this year. Cucumbers are vine-y and they always grow on the garden box topper making it very difficult to get into the box so this year we are making them a growing lattice and planting marigolds in the same box to help deter critters. Fingers crossed.
The Garden Design
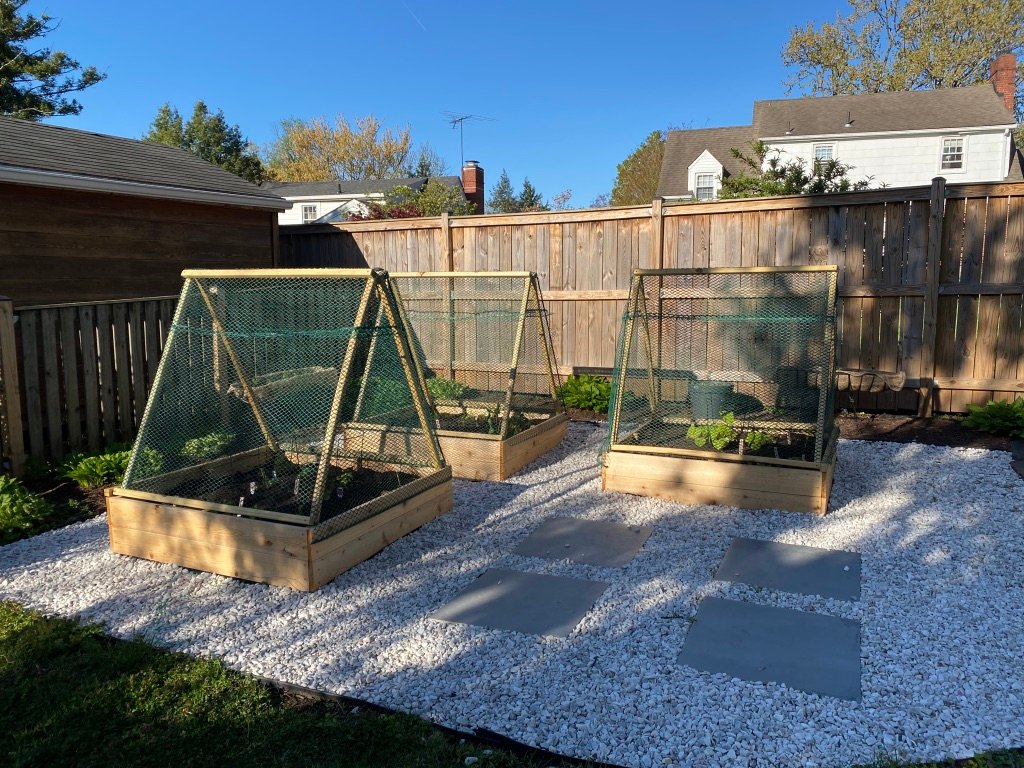
When we started the garden, I really wanted raised boxes with a white rock walk path. The corner of our yard that gets the most sunlight had space for four 4 foot by 4 foot raised garden boxes arranged in a square with a 2 foot walk way in between them. We decided to build three boxes and added pavers and a picnic table to the fourth corner.
After clearing the space and leveling it out we built the frames of the garden boxes and then in the middle added materials for water drainage and to help keep small backyard animals from digging up from the bottom.
We also have had to add removable tops so that deer, squirrels and and rabbits do not eat all of our plants. Each year we have tested a new design, my favorite to date are these triangle tops, however they limit the growth space for tomatoes and other tall plants. They are also hard to get back on once the garden bed are full of green leaves.
Tools you will need
- Power Drill for screws
- Circular Saw (optional hand saw or miter saw)
- Level
- Tape Measure
- Large Shovel
- Wire Cutters
- Rake
- Small Shovel
The First Year Costs (start-up)
We did not keep the receipts from 2020, all prices provided are today’s price via Home Depot’s website. Costs quoted does not include the seeds or plants.
Constructing the box frames
FYI – if this is your first DYI project, wood is not cut into perfect measurements. The true dimensions are almost always not what you’re buying. Products are usually rounded up, I’m not sure why. We have linked the products we used, this is not sponsored or affiliated, we just want this to be as easy and pain free as possible.
- Cedar Boards 1 x 6 x 8
You will saw each board into half and stack them on top of each other to make the frame approx. 12 inches tall and 4 feet long. Each garden box uses 4 boards, total: $21 x 4 = $88 per garden box
For 3 garden boxes = $264 - Posts 2 x 2 x 8 (1 post = $6 per box)
You will use one of these 8ft posts per garden box frame. Saw the post into 12 inch pieces for a total of 8 smaller posts. These will provide support, you will want to screw them into each corner and in the middle of each side. Each garden box uses one post, total: $5.18
For 3 garden boxes =$15.54 - 2 1/2 inch deck screws ($12)
TOTAL : 3 4×4 garden box frames = $291.54 + tax
Once the garden box frames are constructed, you will become a permeant structure in the garden area. We dug up the ground to loosen the dirt and to remove already established weeds. We placed the garden boxes in their place and made sure each side was level. Then it was time to work on preparing the inside of each box for the plants.


Constructing the box triangle tops
To protect our garden from predators we added triangle tops.
- Posts 2 x 2 x 8
The frames for the covers are made using the same posts inside of the garden boxes. For each cover there are five 8 ft posts. Each post will need to be sawed in half for ten 4ft posts. Layout four of the 4 ft posts so that they lay flat and make a square, this will be the bottom of the cover that lays on top of the garden box. Screw the four pieces together to secure the square shape. Using two of the 4 ft posts, you will want to make a triangle shape on top of one side of the square, then you will do the same thing paralle on the other side Using the last 4 ft post, lay it across perpendicular to the triangles and with screws, secure the triangle ends to that post. Each box uses five 8ft posts, total $5.18 x 5 = $25.90 per garden box cover.
For 3 garden box cover frames = $77.70 - The covering
To cover the frames we used plastic fencing draped over the top of the frame and attached with garden ties (we found that using staples did not work, they popped out). For the triangle sides of the covers, cut the fencing to fit and attach with the plastic ties.
One roll of 4ft. x 50ft Heavy Duty Diamond Link Fence, $34.84 (enough to cover all three boxes)
One bag of plant ties, $5.98 (enough to cover all three boxes)
For 3 garden box covering = $40.82
TOTAL: 3 garden box protective covers = $118.52 + tax
Prepping the garden box for plants
The garden boxes do not have a built in bottom. We thought it would be important for the garden to have sustainable water drainage and a way to prevent little animals from popping up from the bottom. Here is how we layered each garden box from the bottom up.
- Weed Guard
Because weeds are annoying and makes the garden look messy.
For 30 garden boxes $34.98 - Hardware clothe
Metal mesh to prevent anything from digging up underneath the box, you will need wire cutters and gloves to cut this to fit inside the frame(s).
For 3 garden boxes = $90 - Landscape Rock
We did one layer of rock to help with water drainage. This is the same rock we used for the walkway path. Each garden box uses 2 bags, total: $5.88 x 2 = $11.76 per garden box
For 3 garden boxes = $35.28
TOTAL : 3 4×4 garden box frames = $160.26 + tax
Once you have the boxes prepped and ready, it’s time to fill with dirt and plant!
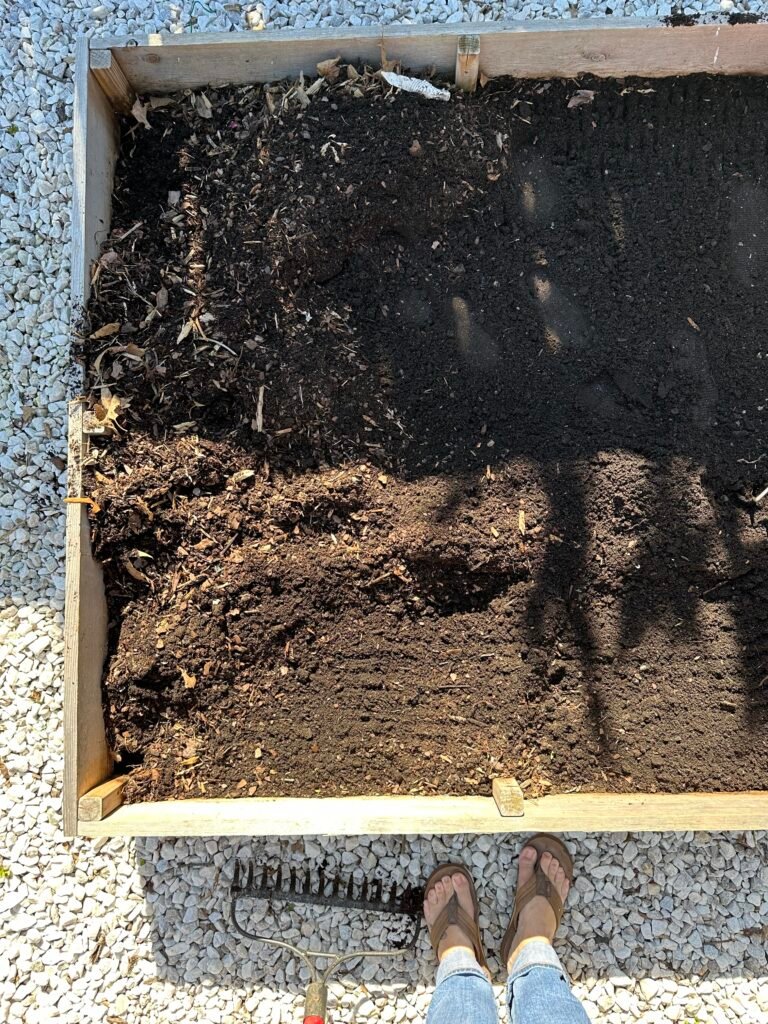
Filling the box
The dirt is a combination of three kinds of soil. We just mixed them together in no particular order as long as each box was full. We use raised bed soil to help with water control and moisture.
- Organic raised bed soil
Each garden box uses 4 bags, total: $9.97 x 4 = $39.88 per garden box
For 3 garden boxes = $119.64 - Compost
Each garden box uses 2 bags, total: $5.30 x 2 = $10.60 per garden box
For 3 garden boxes = $31.80 - Fertilizer
There is more than enough in this one bag for all three garden boxes, you can save the leftover to spruce up the garden the next year.
For 3 garden boxes = $14.97
TOTAL : 3 4×4 garden box frames = $166.41 + tax
DIY Picnic Table Set (no longer available at Home Depot) $150
GRAND TOTAL (not including the seeds): $886.73!!

The Second Year Expenses
After the first year, we added more garden boxes in a shadier space for leafy lettuces and to expand our herbs. We did not include those extra boxes in our second year expenses because they were made with left over wood and materials from our deck DIY. We also tried a different topper, something was not removable and provided more space than the triangle toppers, however we were not happy with the result, so they will not be included in the second year expenses.
After the first year we needed some soil and compost to refresh the boxes. Each box needed two bags of soil, one bag of compost, and we used leftover fertilizer:
- Soil – 2 bags per box – 6 total bags = $9.97 x 6 = $59.82
- Compost – 1 bag per box – 3 total bags = $5.30 x 3 = $15.90
During the first year, we had to water the garden a lot during the summer to keep the plants alive. The second year we decided to add mulch after the plants were in to help with the summer heat.
- Mulch – 1 bag per box – 3 total bags = $3.33 X 3 = $9.99
GRAND TOTAL (not including the seeds): $85.71 – you can’t beat that at the grocery store.
The Third Year Expenses
At time of publishing, we have not yer planted our garden, but we anticipate the same expenses as the second year. As a solution to our strawberry failures, we decided to build a new box specifically for them. We are also going to try a third topper design – this section will be updated at a later date.
Growing the Garden
A lot goes into the garden. You have to decide what you want to grow, it is a spring or fall crop? How much space will it need to flourish? For example, on the first year, we had no idea cucumbers would demand the entire garden box over crowding the lettuces and green beans, they never had a chance to grow.
Seed packets run around $3 in our area. I bought two tomato plants this year for $19.98 each. Last year, we bought start-up herb plants from our daughter’s preschool for a fundraiser. We start about 90% of our garden from seeds each year.
If you have left over seeds, store them in a dry cool place, you may be able to use the again the following year.
First Year Favorites:
Perfect for first year growers, they are easy and demand very little.
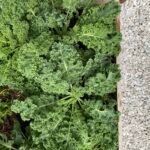
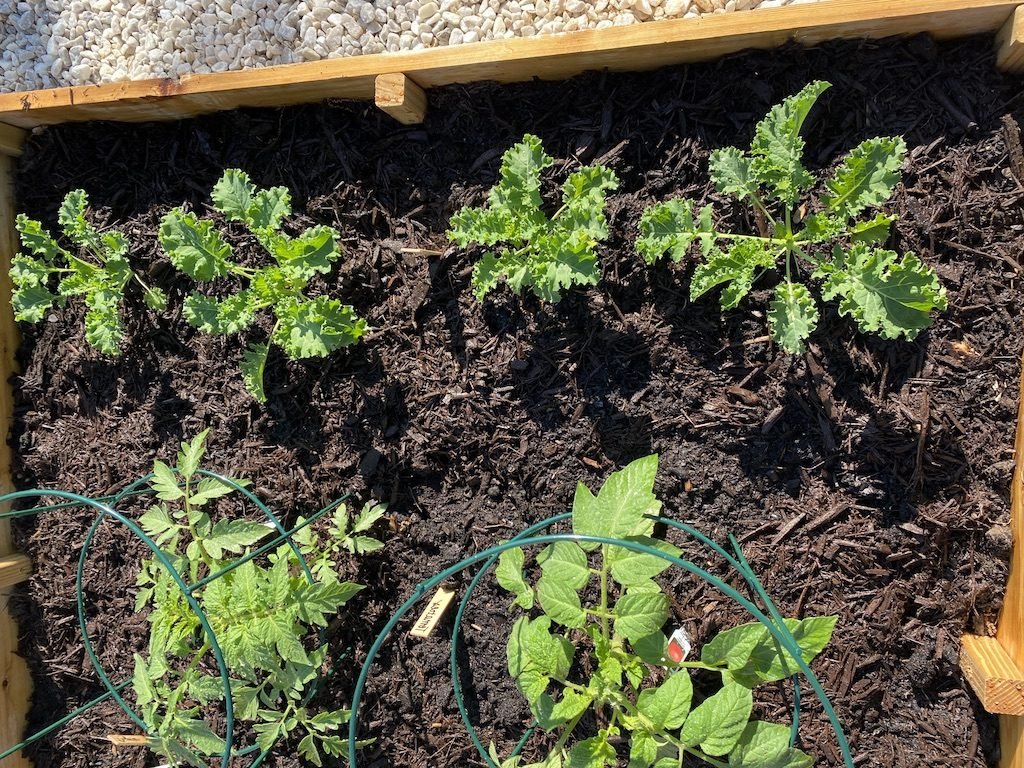
- curly kale
- cucumbers
- basil
- jalapeños
- poblano peppers
- bell peppers
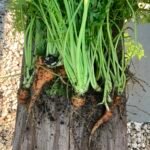
- carrots
- parsley
- cilantro
Favorites that came with the house, planted not in our garden boxes but just in the yard:
- thyme
- rosemary
- sage
- lavender
Failed:
- strawberries, we didn’t get a lot from our plant, they crawl on the ground if you don’t provide them a vine or a place to go. One the ground they were saturated in rain and they never had a chance.
- green beans, romaine lettuce and spinach, they were over crowded by the cucumbers and did not survive.
- tomatoes, they grew but again, we under-estimated the space and we planted too many things in one garden box so we took them out mid-season and sadly they never bounced back.
Second Year Lessons Learned and Changes Made:
The second year, we did all of the first year favorites, except for kale. We tried to use last year seeds and they never grew and we could not find the kale we liked to do it. The first year we tried romaine and spinach, however the cucumbers grew overtop of them, killing their chances to grow. We also had a mommy rabbit make a hutch nest for her babies and they nibbled on the romaine.
For the second year, we also built three smaller garden boxes near our home in the shade and planted romaine, spinach and arugula.
Second Year New Favorites (to add to the list of the first year):
- romaine
- arugula
Failed:
- spinach, seems to be too delicate to share a garden box with another plant. I think we are skipping this one for the third year.
- mint, mint is so easy to grow but it’s a vine, it needs space and to be alone. I think we will try again but put it in a flower pot like I used to when I lived in an apartment.
- oregano, we didn’t use it. It grew perfectly fine but we didn’t use it.
Third Year.
It is still too early to tell but we are trying these two new ones!
- shallots
- garlic
Seeding the Garden
We start our seeds inside, until the winter is officially over. If snow and frost is a threat, you do not want to plant outside until after that period. This year (year three) we figured out that you can work backwards and you can look up the possible last frost date for your region in the farmers almanac and then knowing that, you can use the timeframe on the seed packet to know when it needs to start.
We do about 6 weeks. So we plant our seeds in the beginning of March to have a plant-outside-in-garden date around mid-April.
To start the seeds we use a seed starting soil mix in a seed tray. The first two years we used several Costco plastic egg cartons (2 dozen eggs) with small holes poked in the bottom for drainage. This year we went for the real 72 cell seed starting tray.
Once the soil and seeds are in their tray or egg carton, you want to place it on a tray that has sides so when they are watered, the water does not run all over your table. Also the seeds can then sit in their water and soak it up through the bottom when they need it.
When the days are warmer, you should set the seed trays outside so they can get direct sunlight. Also when there is a warmer rain, set the trays outside. Rain is the best water source but you don’t want them to drown in a storm. The key is to bring all the seed trays back inside before the cold night comes. This process is called hardening and it allows the little plants to adjust to the outdoor conditions like sunlight and wind.

How to Plant the Garden
We have lived and learned that plants need space, this is our recommendation for space needed between each plant.
- cucumbers – 24 inches (with something to climb up)
- kale – 18 inches
- peppers (all) – 12 inches
- basil – 12 inches
- romaine and arugula – 6 inches
- carrots – 4 inches
At the end of the season, we harvest what we can and pull up the roots. We leave the soil in the box and then the next spring season when we are ready to start the garden we rake up and remove any sticks, leaves and the top layer of the mulch. We keep as much of the same soil as possible because it has aged and from what I have read, retained nutrients from last season. We add a bag of new soil and compost and rake it in so that it’s spread out, then it is ready for planting.
The Importance of Trimming & Harvest
We are still learning this but if you want your plants to grow to their fullest potential, they need to be trimmed and harvested properly.
Bolting: If your herbs start to sprout flower buds, they were not trimmed or harvested timely. Once the flower buds pop up, the herb will no longer taste as good because it essentially went into fight mode. The flowers are the herbs way of reproducing because it thinks it was abandoned by you.
Do not confuse herb bolting with flowers on a fruit or vegetable plant, you will most likely see flowers bloom before the vegetable or fruit pops out – this is a good sign.
What we do know how to harverst.
- TOMATOES: you can pull tomatoes when they are still green if you have squirrels, they will ripen on the counter in your kitchen or you can make fried green tomatoes.
- CUCUMBERS: will start to get too large and turn a yellowish color, they will no longer taste their best once they reach this stage.
- ROMAINE LETTUCE: trim off close to the bottom, but not the root and it should grow another one.
- BASIL: trim the leaves not the stalk. Leave some large leaves behind so that it can still capture the sunlight to grow more.
- KALE: cut at the stem, cut off the larger leaves so that the small ones can grow.
- CARROTS: The Little Green Yard has some great tips and tricks!
The best advice I have is to look it up online, become familiar on when and how your plants need to be trimmed and harvested. Each one is different so it’s important to learn.

The Most Important Advice We Have
Have fun and try something new! Most of these plants are easy growers. It is so much fun to grab your fresh herbs, vegetables and fruits from the garden for dinner.
A Few Garden Fresh Easy Recipes:
- Summer Basil Pesto
- Cucumber Tomato Salad
- Gazpacho
- Grilled Steak with Balsamic Tomatoes
- Cucumber Margaritas